
Batik on Paper
Batik is a fun, dynamic way of creating bold and beautiful designs on cloth but did you know batik can be made on paper too? We used some Tej Prakrtika paper (as well as testing some others) to create a colourful, abstract batik.
You'll find lots more batik projects here.
Begin with your paper on a plastic cloth or board. It might stick so it needs to be something it will peel off. Heat the batik wax in a batik pot. It needs to be hot enough to penetrate the paper (we like to have our Tixor Malam wax pots on a 5 or 6 on the dial). Heat up your tools by leaving them in the wax for a minute or two. You can use a combination of tools including tjantings and brushes, but they must be natural fibres or they will melt!
Apply the wax to the paper using your chosen tools. Dip the tools frequently into the wax pot to keep them hot and the wax topped up. If the wax gets too cold it will sit on the surface of the paper and look pale - this will let the dyes underneath. The wax should appear darker on the paper, like a grease stain. Anything that is waxed will remain the colour underneath - in this case the white of the paper.

See our detailed instructions on how to use a tjanting here.


When the wax has been applied you may add your first dye colour. Mix Procion MX dyes with water to create your chosen shade. The dyes are translucent so usually we work from light to dark, thinking about how the colours interact with the layers underneath. Working through a colour family is a good place to start (e.g. yellow, light green, dark green, indigo; or yellow, orange, red, brown etc.) Using foam brushes works well.

Depending on the paper, it may start to pill up if too much liquid is applied or brushes are worked into the surface too much so be aware of this as you are working and experiment with different papers.
When the first layer of dye is completely dry, add a second layer of wax. If the paper is not dry, the wax will sit on the surface of the paper and appear pale.
This layer of wax will preserve the first dye colour wherever it is placed (in this case lemon yellow).

Apply the next dye colour. Experiment with blending colours for more interest. If you have areas defined with wax (like the inside of the circle below for example), bold contrasting colours can be kept apart from each other.

If you are used to batik on fabric, you will find that the dye spreads a lot less when working on paper, although it still blends nicely,
When the paper is completely dry, apply the next layer of wax.

Apply a final layer or dye (or keep going in as many layers as the paper will fit!)

To remove the wax, place the dry batik on a wad of newspaper. Place a sheet of newspaper on top and iron over it so the wax melts into the newspaper. Replace the sheet and repeat until no wax appears on the newspaper. It's crucial to use a batik-designated iron for this or you may ruin some clothes next time you use it!

Above, you can see that some of the dye spread into the waxed areas giving lovely soft edges. When we experimented with different papers, this result varied so we recommend trying lots of different types to see what you like! Below we used Kent which case us crisper edges but curled a little when wet. We also tried some soft grey scrap paper but this fell to pieces quite quickly when wet.


The dyes are so vibrant on the paper! For best results, don't keep them in direct sunlight or they are likely to fade.
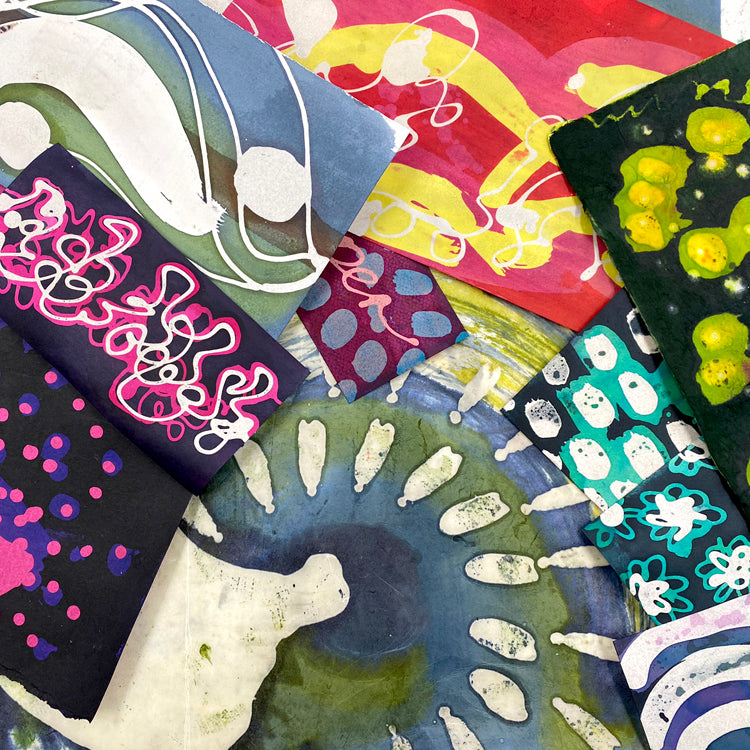
All of our paper batik experiments:

For this project you will need:
Plastic table cloth or board
Paper - we used Tej Prakrtika and Kent paper but others can work too
Tools for wax like natural fibre brushes and tjantings
Brushes/ Foam brushes
Iron
Newspaper
Find more batik projects here.