Block Printing onto Fabric with Permaset Aqua and Speedy Carve

It can be difficult to find the right inks for block printing onto fabric, especially if you haven’t got a few days to wait for it to dry. We have loved screen printing with Permaset Aqua Textile Inks, so we wanted to try block printing with them too!

Start by making your blocks. We embraced the autumn and created a pretty two layer pine cone print! We drew around our template and cut the shape out of Speedy Carve.

Carving around the edge of the shape with a thin lino tool first made it easier to follow the line with a scalpel.

We made two of these identical blocks for our two layer print.

Transfer the design for your second block onto the second piece of Speedy Carve. We used the classic soft-pencil-scribble-drawing-on-the-back method seen here:

After the image was transferred, we used a permanent pen to make the lines more prominent before carving our block using a lino cutter.
Scoop out a small amount of Permaset Aqua onto you inking tray or sheet of glass. These inks are inter-mixable so create whatever colour takes your fancy! We used Mid Green mixed with Standard White.

Now for the clever bit: when you’re happy with your colour, sprinkle a few grains of table salt into the ink. As you mix it in, the ink should start to loosen up into a runnier consistency. Please only add a few grains at a time, not a liberal sprinkling as if you were trying to save a bland soup – you can always add more but you cannot take it away, as everyone’s mother once said.
This clever trick from Jezze Prints (who makes all kinds of beautiful things), creates an ink that coats the block in a lovely thin layer of ink without diluting the colour or affecting the colourfastness of the print. Nifty huh?

When you are happy with the consistency, which should be loose but not drippy, lay on your piece of felt or thick fabric. As you press the block onto the fabric a few times, the ink should begin to come through, and lo and behold, you’ve made a stamp pad.

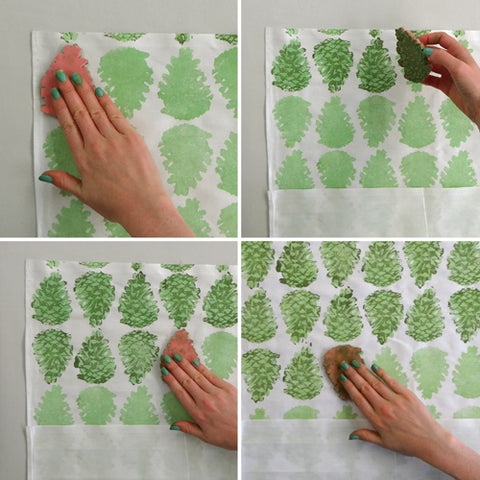
You are now ready to print. Load up the block with a layer of ink and press it onto your fabric with the flat of your hand. We folded up the bottom of the tea towel to act as a guide to printing in a straight line.

Continue to load up the stamp and print in this way…

…until you have printed over the whole surface.

While this first layer dries, use the same method as above to mix up the ink for your second layer. We mixed Mid Green, with tiny amounts of Standard White, Black and Orange R to make this grungy darker green. Use a fresh piece of felt, or if you only have one piece, ring as much of the previous colour ink out. Don’t wash the piece of felt out at this stage or the water in the fabric will mix with the ink making it too runny. Press in your new stamp a few times, until only the new colour comes through.
Repeat the process as before. As the two stamps are the same shape, it should be easy to register the two layers.

When the second layer is finished, wash the ink off your stamp to use another day! When the prints are dry, iron the fabric on the reverse to set the ink.
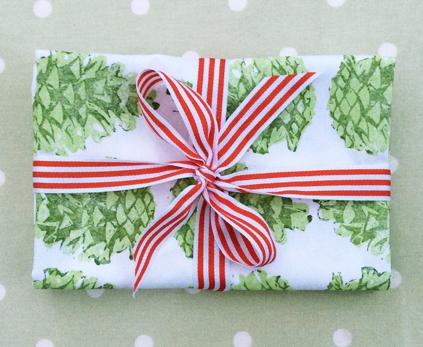
Our finished tea towel!


You will need:
- Permaset Aqua Textile Ink
- Speedy Carve
- Lino cutters
- Craft knife or scalpel
- Soft pencil, permanent pen and paper
- Inking tray
- Ink spatula
- Piece of think felt or similar thick fabric slightly larger than your block. We used a heavy cotton wadding. You could also use a piece of foam.
- Tea towels
- Table salt
