
Block Printing Registration Using Measure Pattern Tape and Madder, Cutch and Co Inks
Measure Pattern Tape is a really useful bit of kit for your printmaking projects. This adhesive ruler tape can be stuck onto your printing surface or board to help lay out your designs accurately. It's self-adhesive and we've even found it can be lifted up and re-used a couple of times until the stickiness is gone (this will depend on your surface). Here, we use it to help us register blocks for printing onto fabric. This way we can make sure our spacing is accurate and straight.
We're block printing using Madder, Cutch and Co. inks which are made using natural pigments. They can be used for screen printing too, but we're using them with a stencil foam brush to apply to a block.

Pin your fabric onto a padded surface. Unroll some measure tape and stick it down on the fabric where you would like your first row of prints. Use a stencil foam brush to apply ink to a block. This is Madder, Cutch and Co ink in Burghley Blue. This mounted square lino block has been carved using the method in this project.

Position the block face down on the fabric, using the measure tape as a guide.


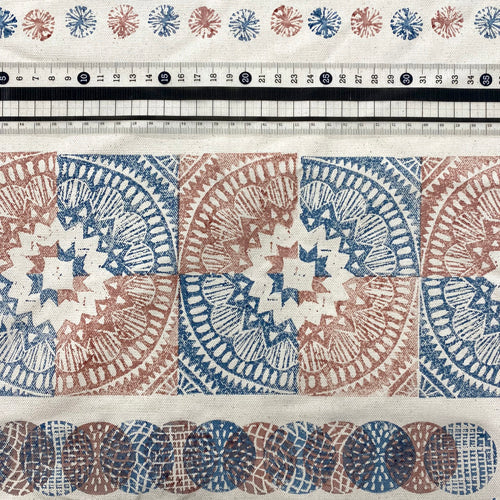
We're printing in alternate colours, which means we need to leave the correct size gap between the prints. The measure tape will show us the exact space needed for a print to fill in the gap with another colour later - in this case, 7.5cm.


Further rows can be printed above, using the gaps as guides.


Our second colour is Madder Red.

The gaps left between the blue prints should exactly fit the red prints.


Measure tape is also useful for blocks that do not sit right next to one another, like these round printmaking stamps, to ensure even spacing.

Crosses drawn on the back of the stamps will help us to line them up.


Blocks without clear printing edges can be particularly difficult to print accurately.. Here we have a small block mounted on a baren to ease the printing process by making it cleaner, less fiddly and easier to exert pressure on the block.

To place this print accurately, we can use the measurements in line with the edges of the baren (or wooden block etc.), even though we cannot see where the stamp will print.

For even more accuracy, the edge of the baren or block can be lined up with the tape to give a straighter line of prints.

To heat set these prints, use an iron on a hot setting (appropriate for the fabric) and heat until the print feels hot to the touch.

For this project you will need:
- Padded surface
- Fabric to print onto
- Measure Pattern Yojo Tape
- Madder, Cutch and Co inks
- Stencil Foam Brushes
- Blocks, e.g. Mounted Lino, Mastercut Printing Stamps,
- Baren (from Lino Cutter and Baren Kit) - optional
- Iron