Designing a Repeat Pattern by Hand
This method is quick and simple. No digital equipment or software is required: all you will need is paper, a pen/pencil, tape and scissors. With this technique, a repeat pattern can build seamlessly with no awkward joins or obvious lines. It’s perfect for a scatter design and can be used for screen printing or block printing.
Read on for instructions or scroll down to watch a video.
This technique will create a straight repeat pattern: you build up the pattern by printing directly alongside and below your previous print.
Begin with a piece of paper a little smaller than the piece of lino you will be using, or a size that will easily fit in the printable area of your screen.
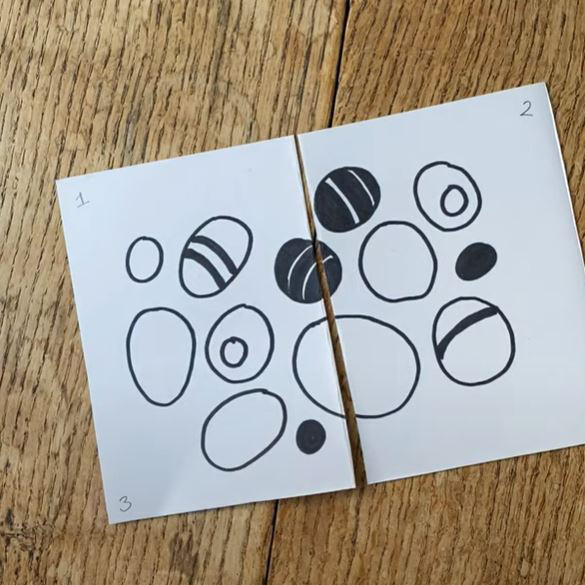
Start to draw your design in the centre of the paper. Fill in the middle of the paper with design but don’t work at the edges yet. Scatter designs are perfect for this technique: this means that the design is created from separate motifs with spaces between them.
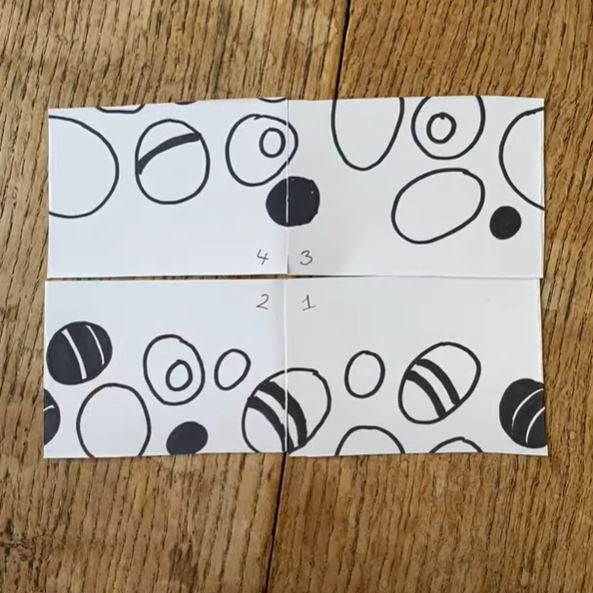
Fold the design in half and cut along the fold line.
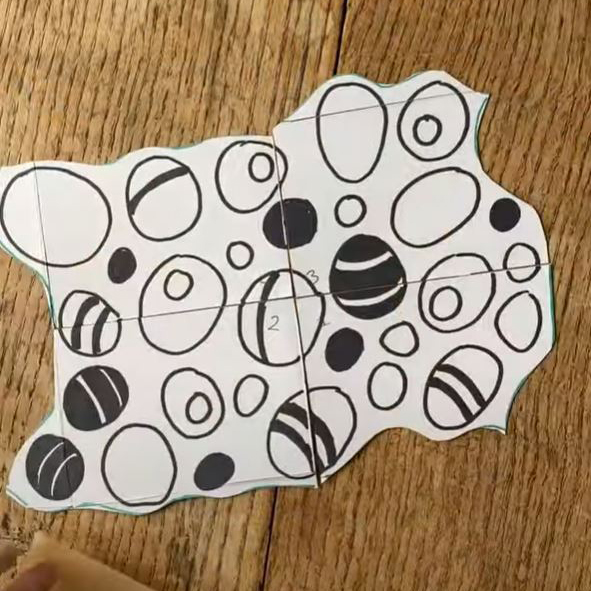
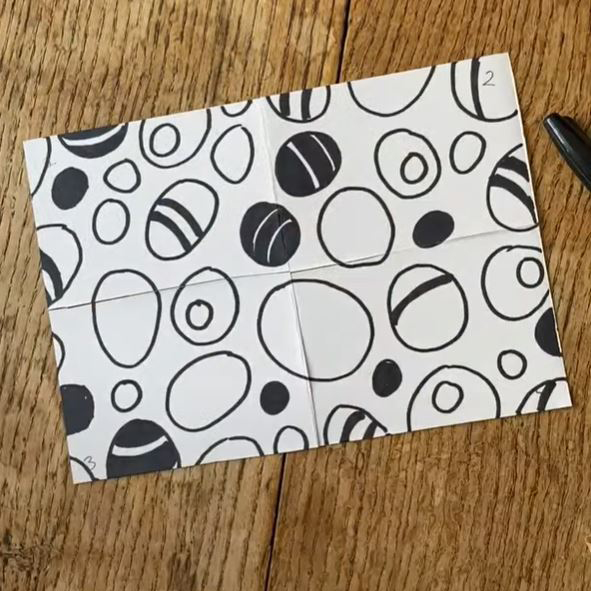
Mark your corners 1, 2, 3 and 4. You can also do this before you fold and cut (but we may have forgotten…)
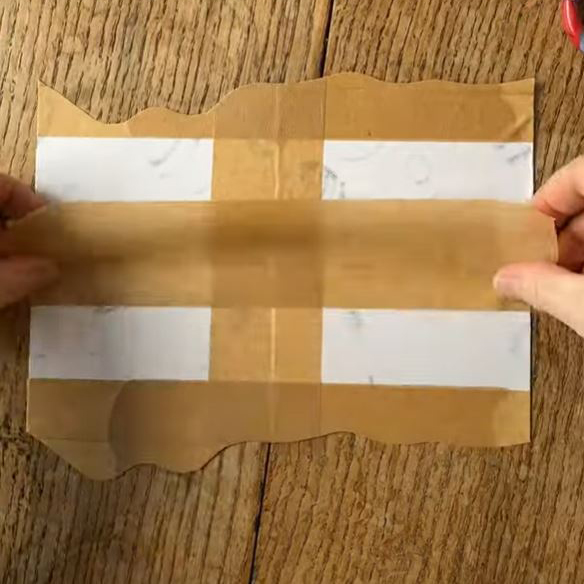
Swap the two pieces round so that the cut lines become the outside edges. Stick them together at the back with small pieces of tape.
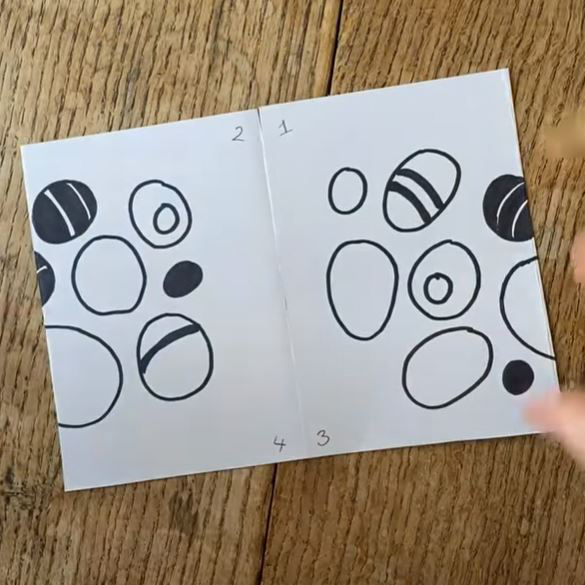
You should now have a new blank space in the centre of the paper, created where the two edges have now met. Draw more design over this new middle. Again, don’t draw all the way to the edges yet.
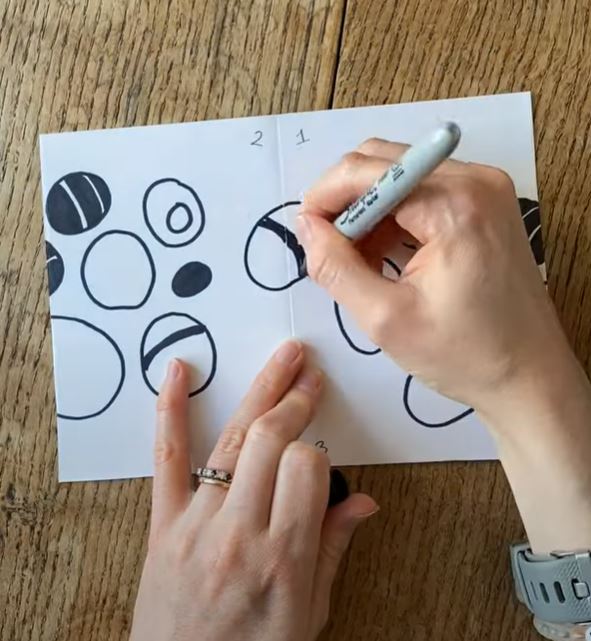
Next, fold the paper in half in the other direction. Cut along the fold line.
Swap the two pieces so that the top becomes the bottom and the bottom becomes the top. Follow the pictures (or watch the video at the bottom of the page) to avoid confusion!
Stick them together with small pieces of tape at the back.
Draw over the new join to fill in any blank spaces. You can draw more closely to the left and right edges but do not touch them with the design.
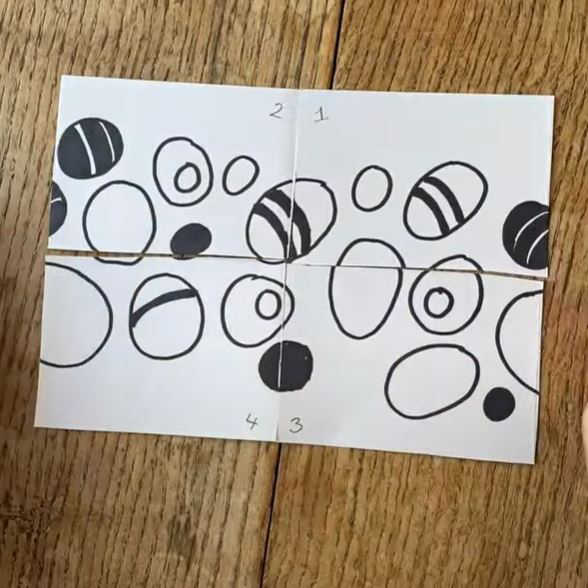
Unstick the pieces and rearrange them in their original places: 1, 2, 3 and 4.
Stick them at the back, with long pieces of tape this time to make sure they stay in place.
We now know for sure that the edges will match up because of the way they were drawn. If we were to expose this design on a screen or carve it onto a block, we would have half-shapes trying to match up. This is absolutely fine for some designs, but to avoid this, we can take it a step further:
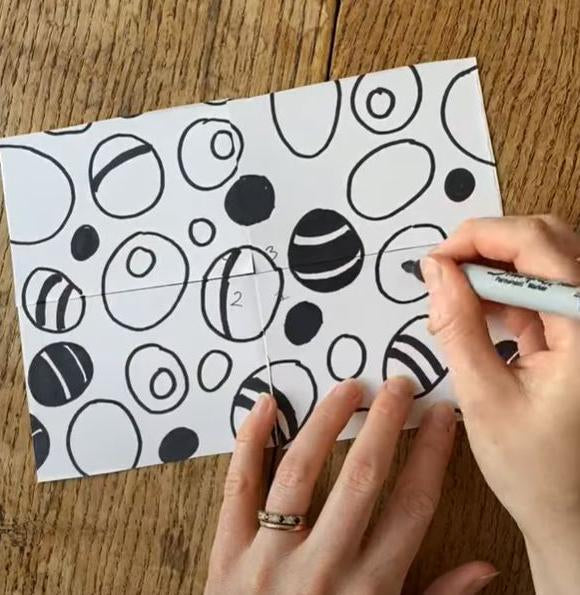
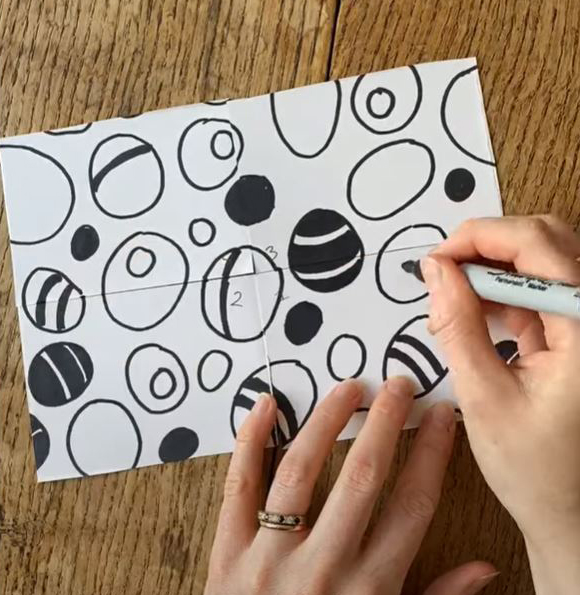
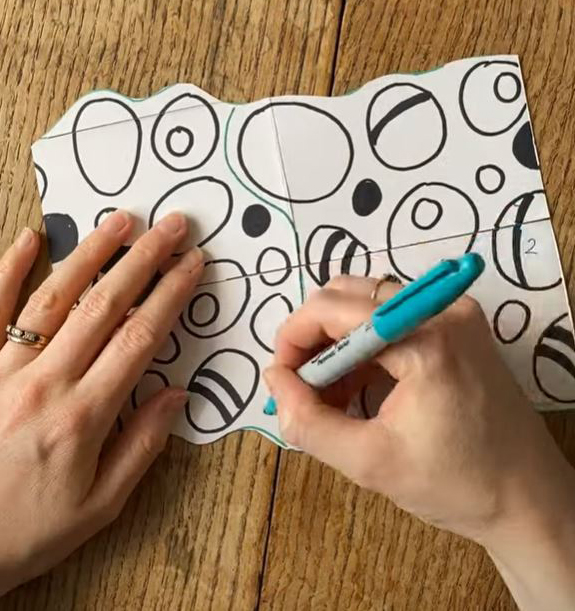
Take a different colour pen or pencil and draw a line down the middle of the design in one direction. This time though, we will wiggle the line between the elements in the design, sticking in the gaps between the motifs.
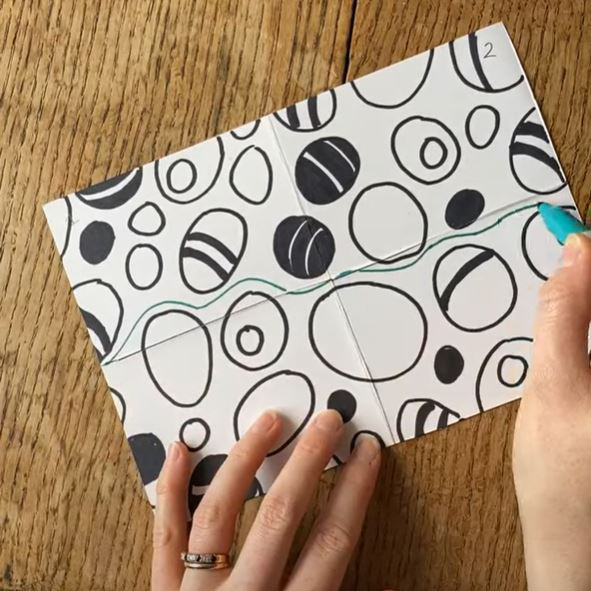
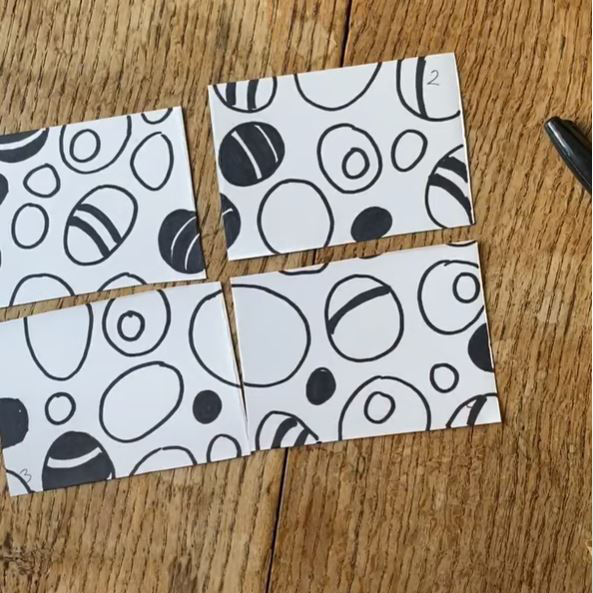
Cut along this line.
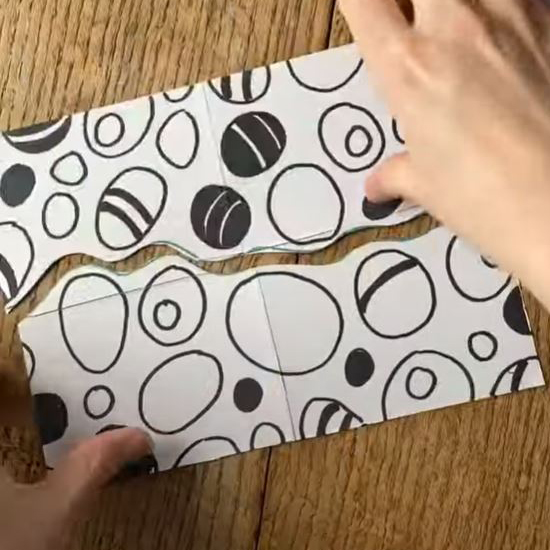
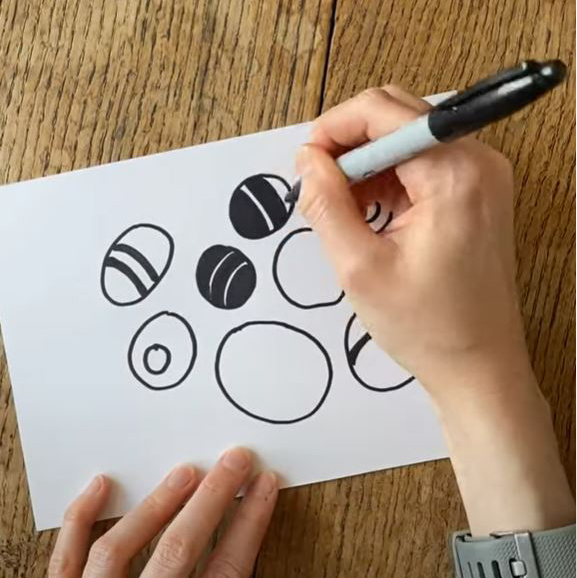
Swap the two pieces around again.
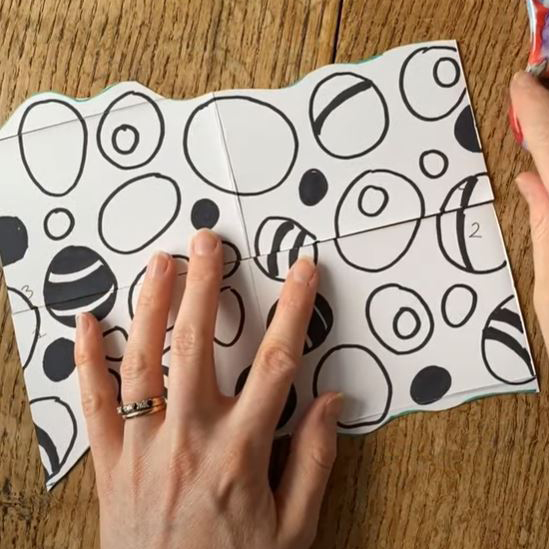
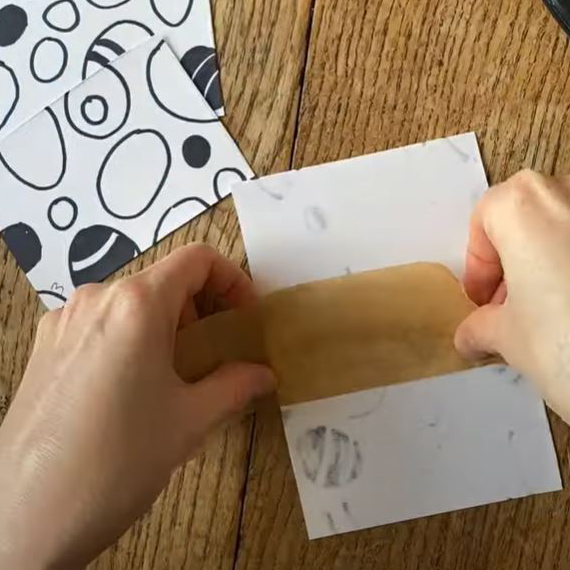
Match up the design and tape it at the back.
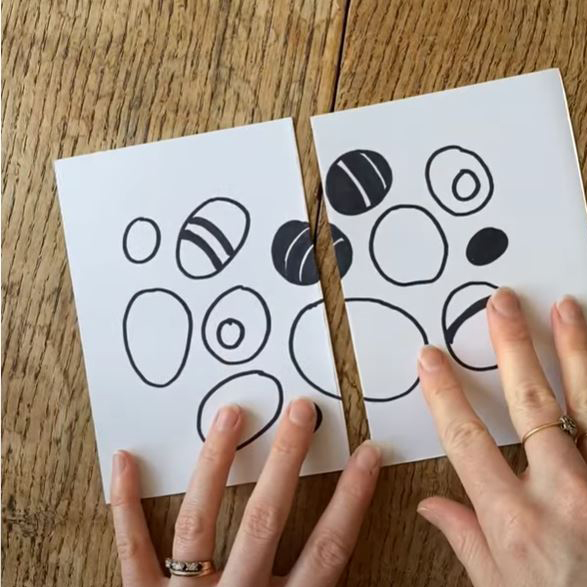
Repeat down the middle in the other direction by drawing a wiggly line between the designs, cut, swap and tape.
You should now have a design that fits together like a jigsaw piece but with no half shapes! This design is ready to be transferred to a lino block or screen for printing your repeat pattern.