
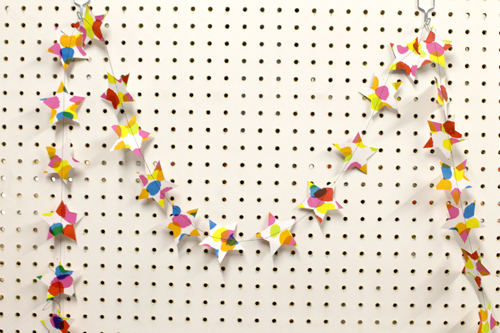
Handprinted Christmas Project: Shirley’s Star Garland
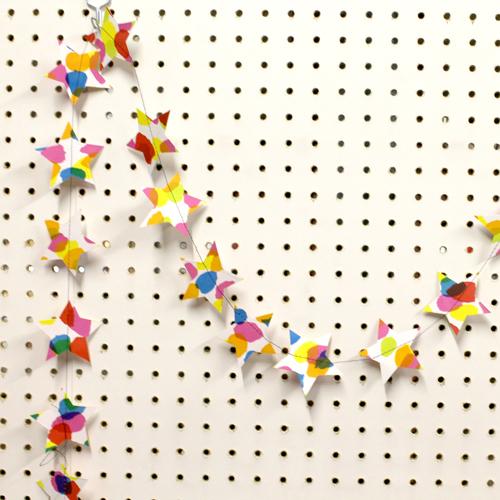
Shirley’s star garland is a beautiful and colourful addition to your home this Christmas!
Begin with several sheets of stars – print Shirley’s star template A4 page here. This long garland used 8 sheets of stars. Use whatever paper that can go through your printer – Shirley is using Kent which is thin enough to go through our printer but sturdy enough to create a stable garland.
Use A3 newsprint to create a stencil. Concertina fold the newsprint into long strips. Tear semi-circles along both edges and open the paper out to reveal the stencil. Make one stencil for each colour layer you would like to use.
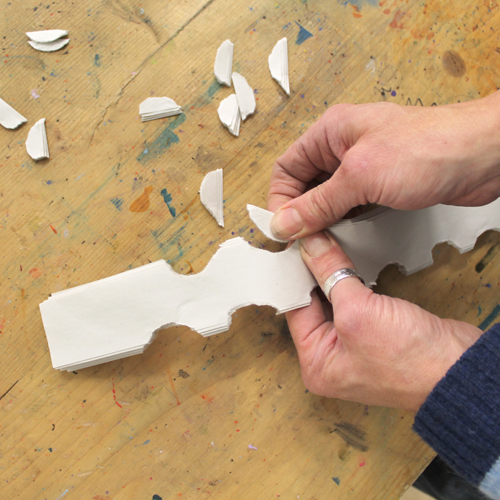
Place the printed star paper onto a hard surface. Shirley is using a board fitted with hinge clamps. Place the stencil over the top.

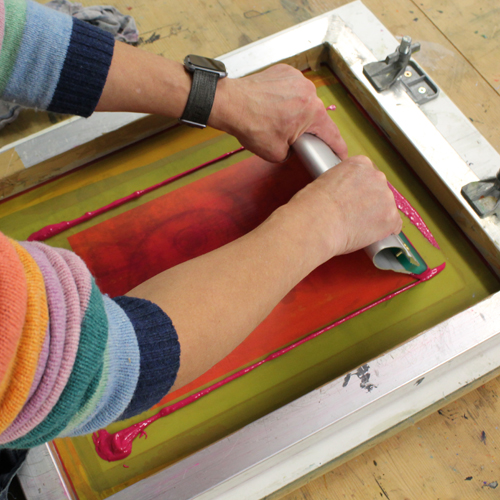
Tape off the area of the screen outside of the A4 printable area. Shirley is using an A3 90T screen exposed with an A4 aperture.
Holding the screen slightly away from the paper, spoon a row of acrylic screen printing ink (ready-mixed or acrylic paint mixed 1:1 with acrylic medium) along the bottom of the screen. Holding the squeegee at a 45-degree angle, push the ink up the screen to flood the mesh. Place the screen flat onto the paper and then drag the squeegee, again at 45-degrees, down the screen to push the ink through. You should hear a zip sound.
Lift the screen, replace the star paper with another sheet and repeat until there are enough to make a garland of your chosen length. When the sheets have dried, flip them over and repeat the print on the back to make double-sided stars. Dry them with a hairdryer if necessary as we don’t want any ink to dry in the screen.
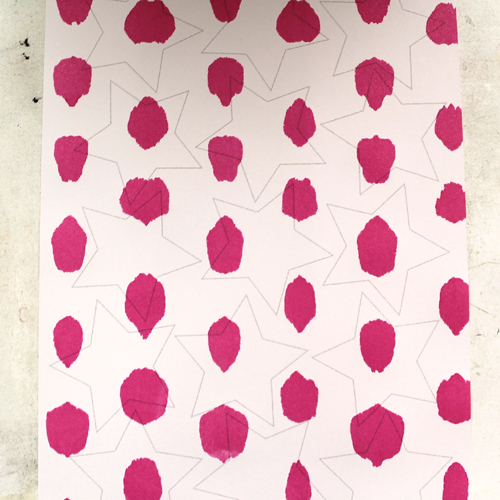
Peel off the stencil and clean the screen with a soft sponge and cold water. When the screen has dried, repeat the process with a fresh stencil and a new colour.
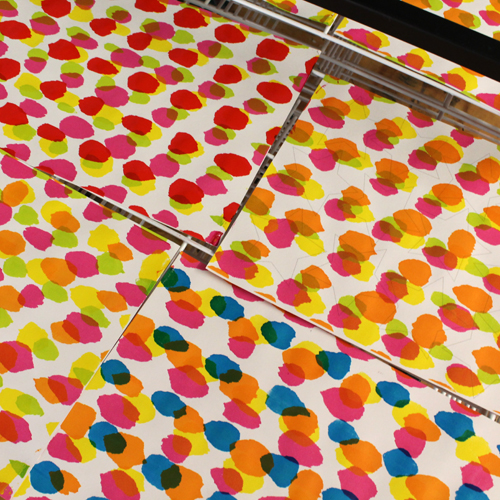
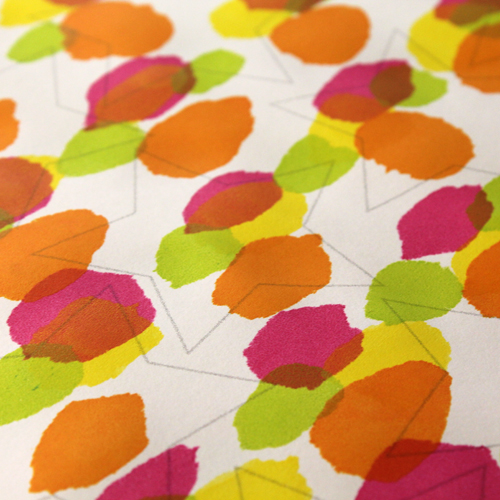
Vary your colours, to create lots of beautiful colour combinations! Don’t forget to print the backs too.

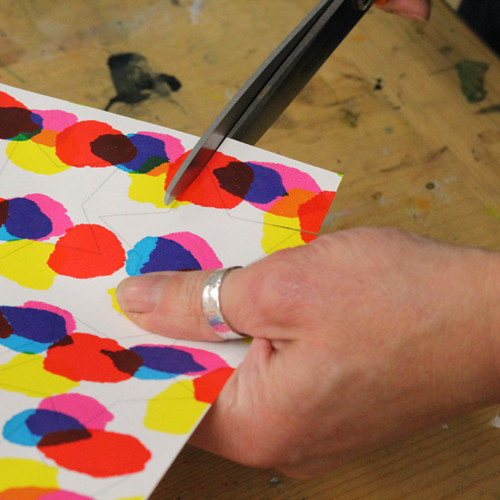
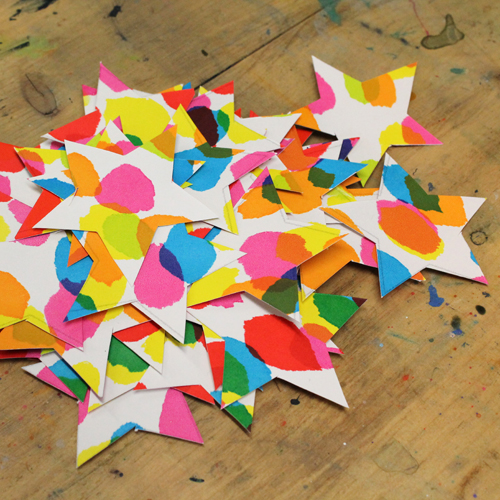
When the ink is dry, cut out the stars.
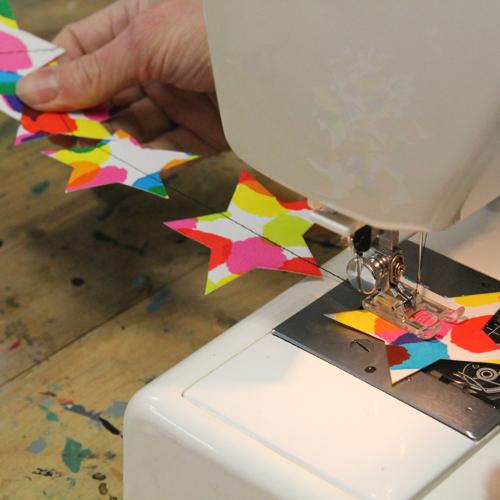
Carefully feed the stars through the sewing machine using a fast running stitch.
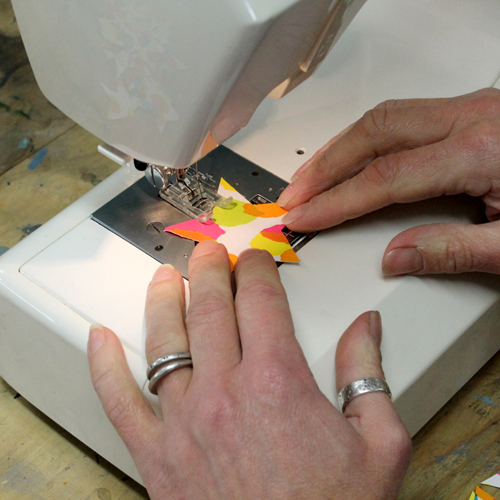
Hold the sewn end of the garland as it comes out to maintain the tension and feed it through.
For this project you will need:
- Printed star templates
- Paper to print on (such as Kent)
- 90T Aluminium Screen
- Squeegee
- Newsprint pad
- Parcel Tape
- Hinge Clamps on a board (optional)
- Acrylic Screen Printing Ink or acrylic paint mixed 1:1 with acrylic medium
- Thread
- Sewing machine
- Scissors
Made this project? Tag us on Instagram @handprinteduk and add the hashtag #printmakingforthepeople