
Using Different Tools to Make Marks on Lino

There are a large variety of different lino cutting tools with different shapes and sizes. The most common lino tools are V Tools and U Tools.
U Tools carve softer lines with a curved end point and an even width but it can be harder to get control over the placement of your edges.
V Tools can give a variety of line widths with the same tool, are good for accurate edges and corners. Lines cut with V tools will have sharp pointed ends.
Carving lino is not limited to carving lines around a drawing. A wide variety of marks can be achieved, creating interesting designs when printed that
are characteristic of the lino cutting process.
We’ve had a go at mark making on lino to give an idea of some of the different marks that can be made. We’ve used traditional, grey, hessian backed lino – on other lino and vinyls the marks will vary as the materials behave differently. We’ve
used Pfeil Tools as well as the Japanese Cutting Tools for Wood and Lino.
Above you can see 24 different marks made using these tools on lino. The lino has been inked up so we can see the marks more clearly. Here’s how they were
all made:
1. Straight cuts made using Pfeil V Tools – 12/1 and 15/2.
V Tools carve deep lines with pointed ends where the tool has been dug into and pushed out of the lino.

2. Pfeil U Tools – 11/1, 11/3, 11/2 and 9/5
U Tools carve lines that are uniform in width and have rounded ends. You can clearly see the marks made by each different tool by its line width.

3. Clearing using large Japanese U tool
U tools are good for clearing as they create more even, flatter areas with less troughs and peaks that can pick up ink.

4. Pfeil 9/5 U Tool with snap off
On traditional grey lino you can create edges by flicking the tool upwards to snap off the piece of lino.


5. Pfeil 15/2 V Tool
V Tools can create lines that vary in width with tapered ends.


6. Circles with Japanese U Tool
Create circles by rotating the lino as the tool stays still.


7. Japanese V Tool with snap off
You can also use the V tool to create sharp edges by snapping off pieces of lino. These shapes have a more pointed end because a V Tool was used.


8. Japanese V Tool corners
Neat corners and arrow shapes can be made by using two cuts of the V Tool.


9. Cutting up to an edge with Japanese V Tool
You can use the snap off technique to cut up to a line before neatening the edge.

10. Cross hatching with Pfeil 12/1 V Tool
The Pfeil 12/1 is a tiny V tool that can be used to carve delicate lines. The cross hatching can be used for creating tone or texture.

11. Japanese Hangito Tool at an angle
The Japanese Hangito tool looks a little like a scalpel. It is more commonly used in Japanese Woodblock Printing but can be used in lino cutting to achieve
sharp edges. Hold the tool at an angle and cut one side and then the other to create a V tool-like gouge mark.


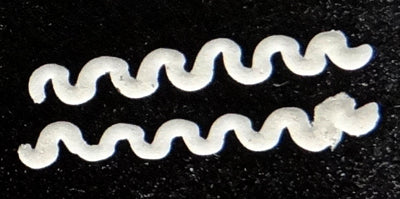
12. Moving the lino to curve with Japanese U Tool
This mark was made by holding a U Tool straight whilst the lino is wobbled from side to side.

13. Japanese Chisel in a square to get sharp edges
Like the Hangito Tool, the chisel in the set of Japanese Tools is more commonly used for Japanese Woodblock Printing. You can, however, experiment with
this tool on your lino – try pushing the tool straight down firmly to create sharp edges and skimming off the surface.


14. Tiny marks with Japanese V Tool
Random, delicate marks in the same direction can create texture or pattern. The V Tools will give you tiny lines.

15. Small dots with Pfeil 11/2 U Tool
The same technique can be used with a U Tool to give small dots.

16. Shallow dot texture with Pfeil 9/5 U Tool
Using a slightly larger U tool and making your marks closer together can create interesting patterns from the raised lino left behind.

17. Circles with Japanese U Tool
Similarly to creating circles by rotating the lino, larger open circles can be made using the same twisting lino technique.

18. Leaving a positive line with Japanese U Tool
Because of their even line width, U tools can be useful when leaving delicate positive lino lines raised.

19. Japanese U Tool snap off up to a line
Use the U Tool to carve up to a positive carved line.

20. Japanese V Tool snap off to a line
V Tools can be used in the same way, when using snap off up to a carved line. Different depths of V Tool will give different shaped Vs.

21. Japanese U Tool spirals
The even line widths achieved by using U Tools are perfect for carving concentric lines and even shapes with control.

22. Wiggling line made by rocking Japanese V Tool from side to side
Hold your V Tool straight and wiggle the lino from side to side to create a jagged line.


23. Pfeil 12/1 V Tool
The Pfeil 12/1 V Tool is perfect for very fine, controlled lines.

24. Cleaning around a positive shape with Japanese U Tools
The edge of this rectangle was carved with a Japanese small U Tool. The background was then cleared using the Japanese large U Tool.

These are just some of the marks that can be achieved using your tools. Experiment with your own to see what you can make
