
Cyanotype
Cyanotype is an early photographic process that uses two solutions (Potassium Ferricyanide and Ferric Ammonium Citrate) to create an image or ‘blueprint’. It was introduced by John Herschel in 1842 as a way to copy notes but was brought to the photographic world by Anna Atkins the following decade through her photograms of algae, seaweed, feathers and ferns.
We are using a Cyanotype Kit to create cyanotypes onto fabric and paper. As per the instructions on the kit, fill both containers with water and shake until they are fully dissolved. For best results, do this 24 hours before using. Mix the two solutions from the Cyanotype Kit together in equal proportions. Only mix what you need at a time (the sensitiser is only stable for 2-4 hours). For one piece of fabric we are using 5ml of each solution.

Paint the mixed solution onto your paper or fabric. Do this in subdued lighting. We are using a cardboard box to block out some of the light. We have pinned a piece of fabric to a frame to help the solution spread evenly and to help it dry. Dry the paper or fabric in complete darkness.

You can use paper stencils to block the light. Any objects used to block the light will appear white in the final design.

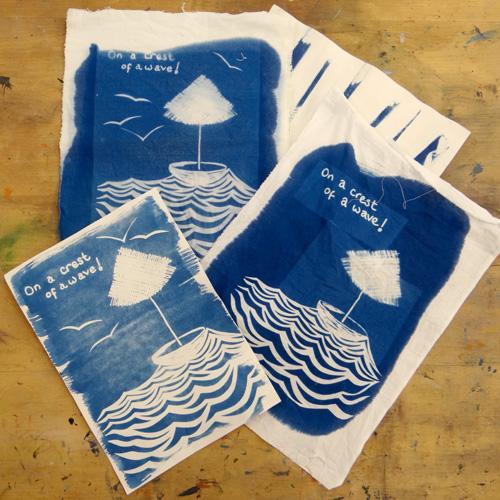
You can also use screen film and an opaque film marker to draw your design.

Use a combination of stencils, drawn designs and objects such as fabric to create a unique design. You could also use larger objects such as scissors, plants or even whole bodies!

If you are using sunlight to expose your cyanotype, you will need to place your objects on top of the painted paper or fabric. Quickly retrieve the paper or fabric from the dark and place your design on top. If your design is flat, cover with a piece of perspex or uncoated glass to hold the design still. We used bulldog clips to hold our sandwich together onto a board.

Watch as the cyanotype turns from a bronze or green colour to dark blue.


When it has turned blue, remove the plastic objects on top and quickly rinse in cold water. The unexposed area should turn white.

Leave the paper or fabric in a tray of cold water for five minutes.

If using an exposure unit, the light source will be from below. In this case, you will need to lay the design down first, making sure everything is laid down backwards. Lay the treated paper or fabric on top of the design, painted side down before exposing. Exposure times will vary depending on the unit you are using.

As before, quickly remove the fabric or paper and rinse under cold water.

Once again, leave in a tray of cold water for five minutes.


For this project you will need:
– Cyanotype Kit
– Paper (cartridge paper, watercolour paper, handmade paper etc.)
– Fabric (thin, white cotton such as Prima works well)
– Paintbrush
– Pot to mix solutions into
– Measuring cup or spoons
– Dark place to dry painted paper and fabrics
– Frame and pins to stretch fabric
– Screen Film
– Opaque Film Markers
– Paper stencils
– Objects to use as masks
– Light source such as the sun or an exposure unit
– Sheet of perspex or uncoated glass to hold papers down
– Tray for soaking