
Making a Hinged Board for Screen Printing onto Paper
Using a hinged board to screen print onto paper is a game changer. It allows you to register layered prints and print in identical editions. Here’s how we made our latest batch of A2 hinged boards in the studio:
You will need a board at least the same width and slightly longer than your screen. It needs to be a smooth, rigid, wipeable surface. Laminated (melamine faced) MDF works perfectly. MDF that has been varnished can work too. This board is around 20mm in depth.
This board is for an A2 screen.

You may want to use your board for different sized screens so make sure your hinge clamps are close enough to accommodate all the sizes you would like to use. For small screens such as A4 and A3 you may want to recess your hinge clamps into the board a little to reduce the snap on the screen.
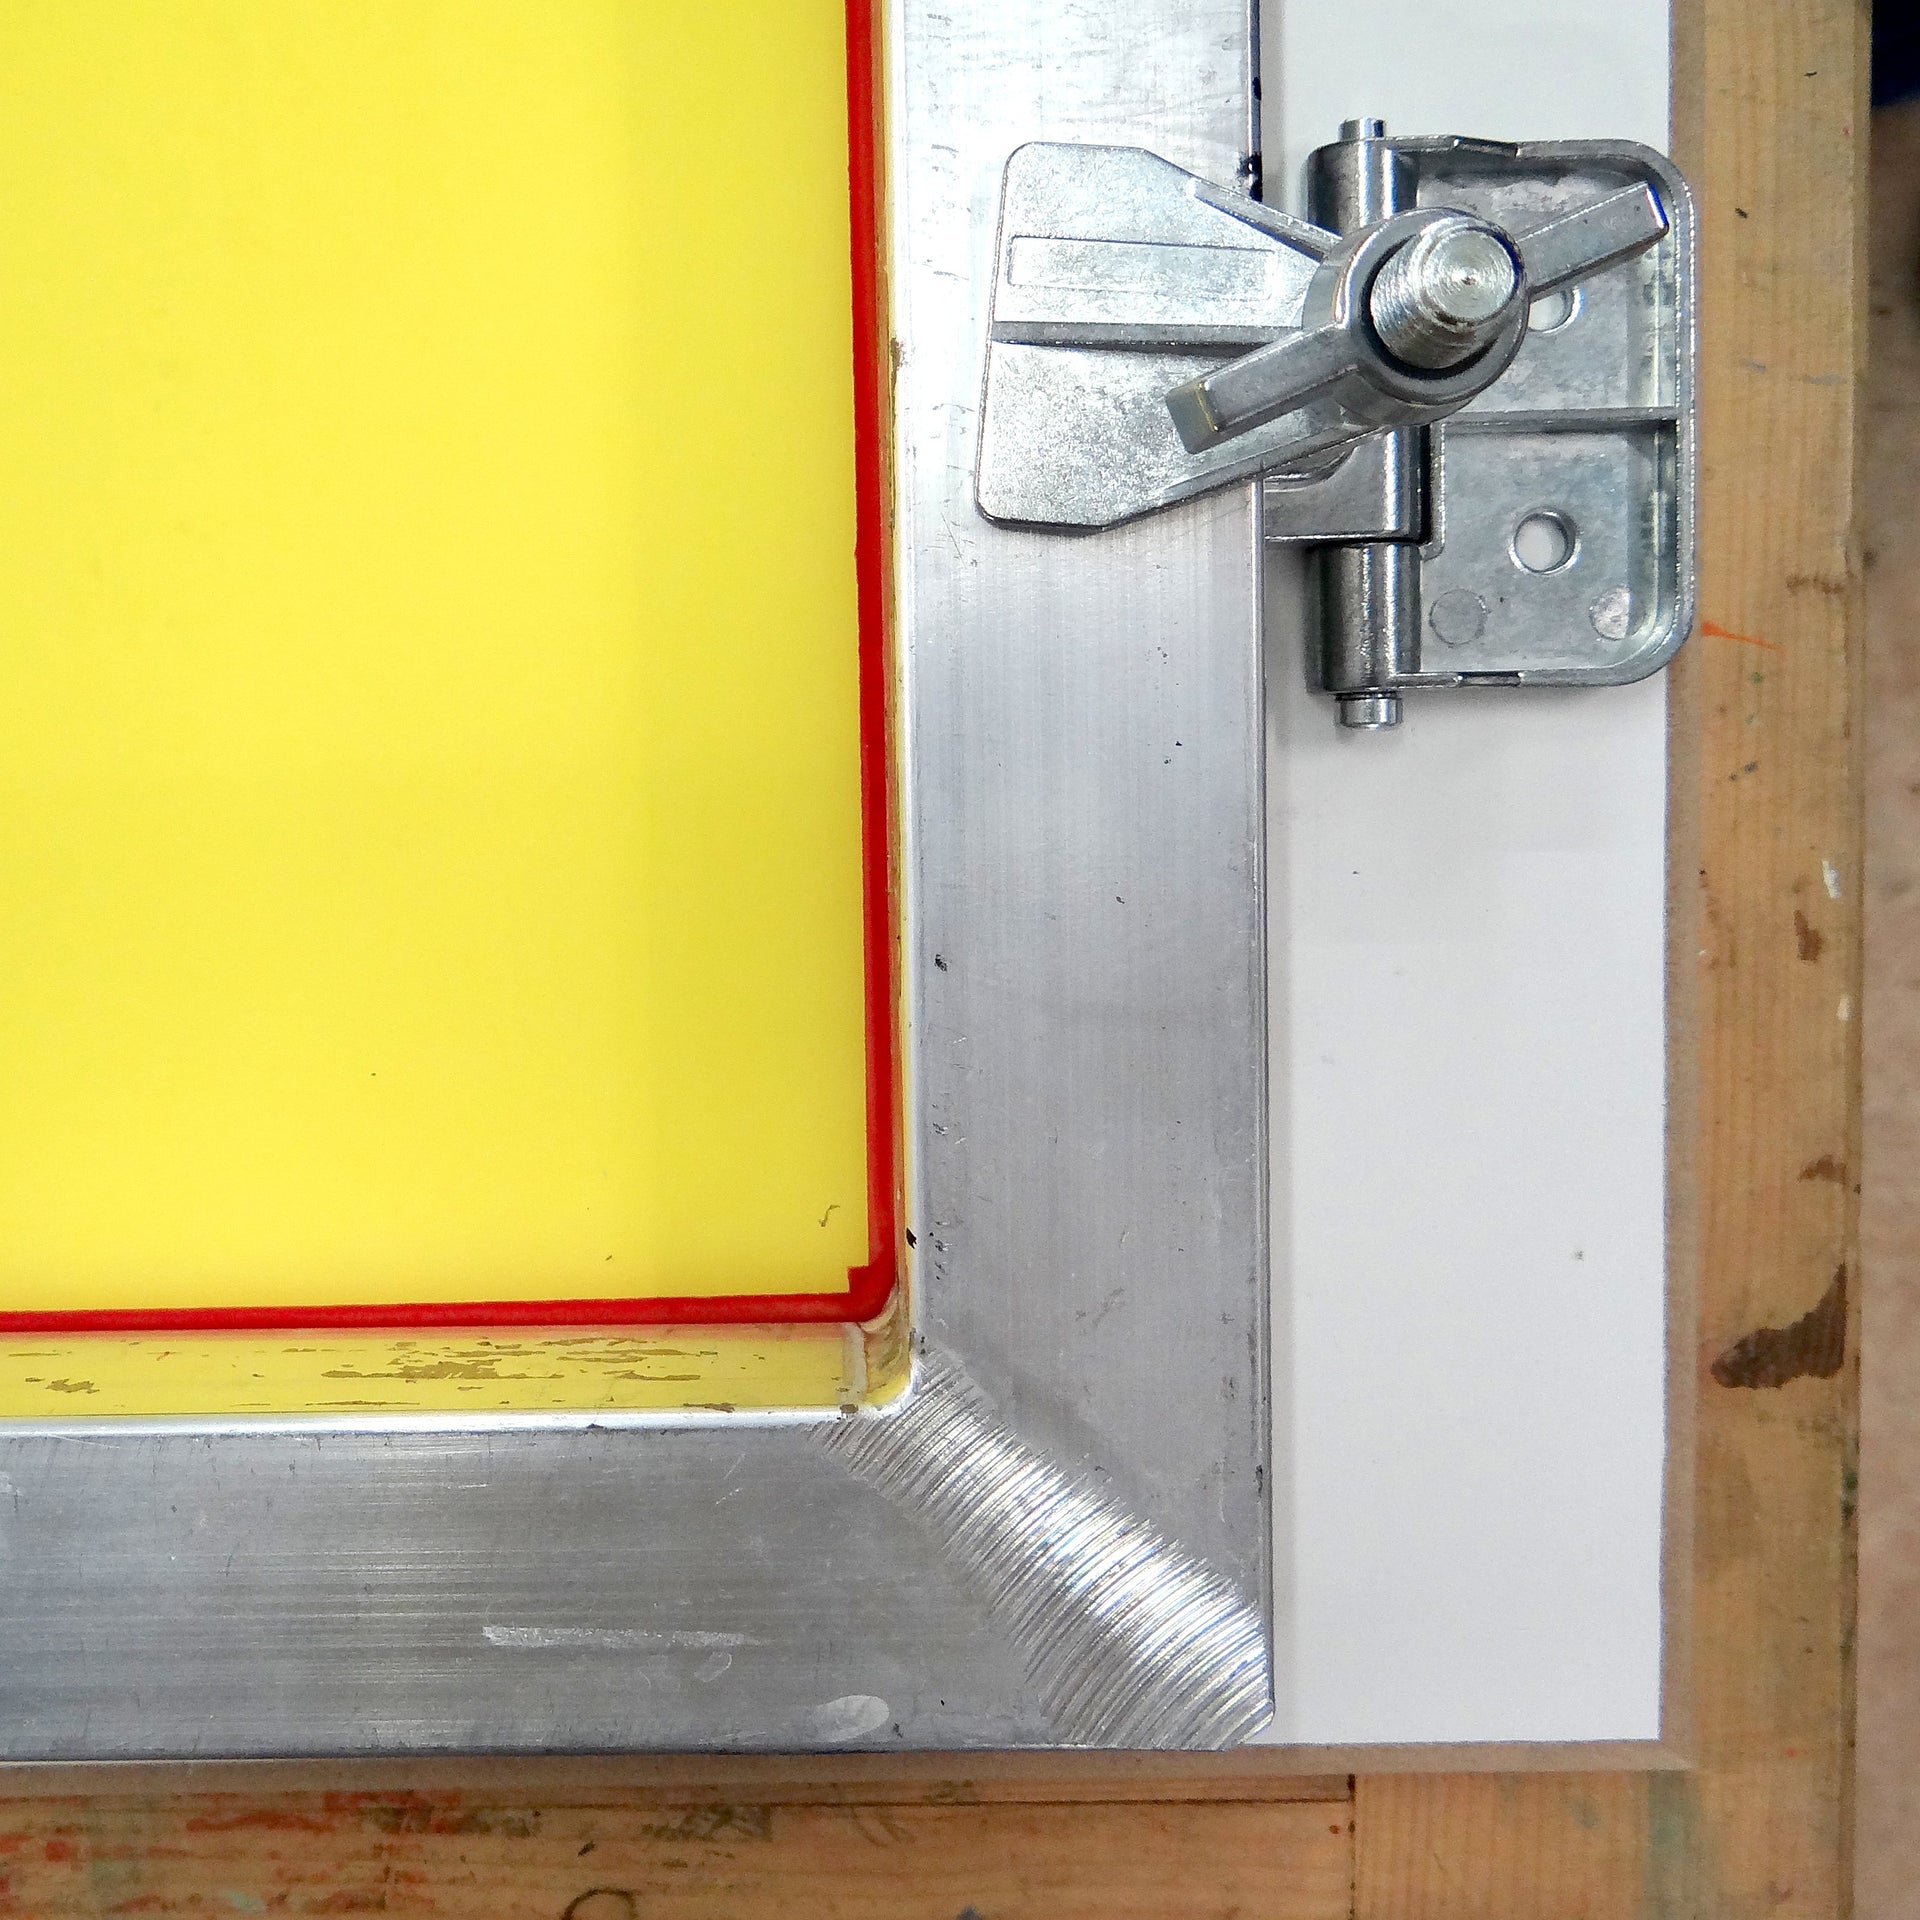
The hinge clamps hold the screen a little above the board – this gives a great snap off for perfect prints but can make it difficult to print close to the frame of a small screen.


Use a pencil to mark through the holes on the hinge clamps.

Drill pilot holes where you have marked the board.


Screw the hinge clamps down to the board. The hinge clamps come with screws but you may want to use alternative screws depending on the depth of the board.

Secure the screen into the hinge clamps by turning the wingnuts. You should now be able to lift your screen up and down.
For easy registration, tape a large piece of acetate to the side of the board. You can then print your design onto the acetate, slide your paper underneath and mark the correct position. The acetate can then be folded like a book page out of the way. Small pieces of mount board are useful for placing the paper in the correct place each time.
