
Reduction Linocut

The reduction lino cut is a method of block printing in which each colour layer is taken from the same block. More lino is removed from the block for each layer and each colour is printed on top of the last. This means that an entire edition must be printed in one go – once you have carved into the block for the next layer, you can’t go back to print more. Because of this it is sometimes referred to as the ‘suicide printing’, but don’t worry, it’s a lot more cheery than it sounds! Here’s how to do it:

Start with your drawing. For this method, it is handy to work from a photograph, or a drawing of what you would like the final result to look like as it can be hard to visualise the final image from the first carving. We are working from a rather lovely photograph of Shirley’s dog Fletcher (of ‘Fletcher the Screen Printing Dog‘ fame).


Transfer your drawing onto lino. We are starting with a sheet of 203×305 traditional lino, (about A4 size) which we then cut into a square with a scalpel and metal ruler.

Begin carving your block. We are using Powergrip tools which are completely gorgeous to work with. The areas you are carving now are the parts you want to remain white. On this print it’s the white parts of Fletcher’s fur, teeth and the odd highlight. These details are easily carved using the 3mm U and the 5mm V tools in our set.

You’re going to need to register your prints so that each layer lines up with the previous layers. You could use Ternes Burton Pins and Tabs for this - they're a great, easy way of registering your print. If you're not using Ternes Burtons, on a large sheet of paper, draw around your block and then mark out where your paper should go. Each piece of printing paper should be cut to the same size in order to register your prints correctly. Do this even if you are only making one print – you will still need to register the layers.

We are printing with Caligo Safe Wash Relief Inks which are oil based but clean up with soap and water (which is heavenly when cleaning palettes and rollers, trust me). All the colours we used for this three layered print were mixed using combinations of Process Red, Process Yellow, Process Blue, Opaque White and Black. We also used Caligo Extender to loosen the ink and make it a little more transparent.

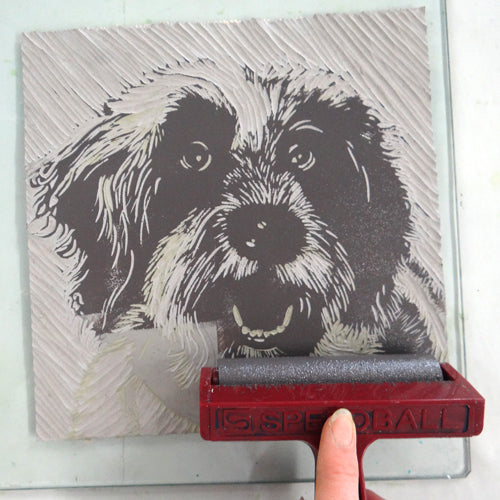
Mix the colour for your first layer. In a reduction lino cut, it is a good idea to work from the lightest to the darkest colour, as dark colours cannot be easily overprinted. Use a palette knife to mix your colour on a glass or perspex sheet. Roll out your ink in an even layer. The ink should make a ‘zzz’ sound when it is rolled out to the right consistency. We really like the slight give of these Speedball Rubber Rollers.
Our first colour is a tasty mustard yellow.

Roll it out onto your block, as evenly as possible.

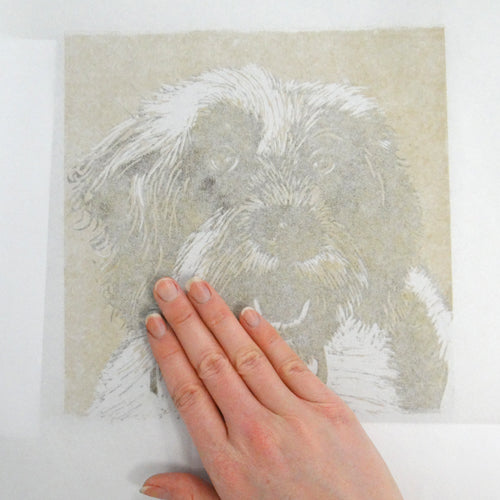
Place your block on your registration paper, inky side up. Place your printing paper on top, using the registration marks you have made as a guide. Thin paper is great for this kind of printing, especially if you are taking your prints by hand and not using a press. We are using Japanese Hosho paper which is gorgeously thin and great to work with.
Use the flat of your hand to gradually rub the back of the paper, or you could use bamboo baren for this.

When you have gone over the whole of the surface, peel off your paper to reveal your first print!

If you are producing an edition of prints (or at least a back up in case something goes wrong in a subsequent layer!) re-ink up your block and repeat this process for your entire edition.
Here is our first layer:

Clean off your block with a cloth, washing up liquid and water ready for your next layer.
The areas that you are now carving are the parts that you want to remain in your first colour – in our case, yellow. The white parts will remain white. We want the background of our print to stay yellow and so used the 6.5mm shallow U and the 7mm Hangito tools to clear the entire background.

When printing with lino, often the peaks of areas that have been cleared can pick up a little ink. If you ask me, this is a lovely characteristic of lino printing, but if you don’t want any of those marks, make sure your carved out areas are flatter and that no areas stick up too much. In any case, when clearing large areas of lino it is a good idea to carve in a direction that complements the print, so that if areas do pick up ink, it adds to the shape and movement of the design. We have carved in parallel(ish) lines in the background, and in the direction of the fur around the edges of Fletcher. We have also removed more of his fur so that it remains yellow.

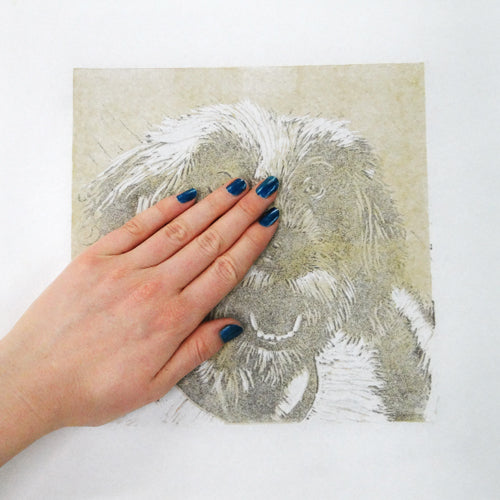
When you are happy with this carving, mix up your second colour.
We went for a mid brown.

Roll out as before on your glass and then on your block.
Place your block on your registration paper and print your entire edition as before.
Our first two layers:

Wipe off your lino with a little soap and water and dry it ready for carving your next layer. If you are printing only three layers (like us) this will be your last carve! Remove any areas that you do not want to be printed in your darkest colour. It is a good idea to have one of your prints next to you as reference – any particularly scrummy bits in your print now needed to be carved out of your block completely or they will be covered up!
Mix your ink as before (we made a dark greyish brown using the process colours, black, opaque white and extender again). Ink up your lino.

Print your lino onto a scrap piece of paper before onto one of your prints. This way, you can see if there are any more areas that need carving out before it’s too late…
Our final print!

For your own canine reduction lino print (or indeed, any themed print) you will need:
- Sheet of lino
- Lino cutters – we used Powergrip
- Tracing paper
- Soft pencil
- Large piece of paper for registration
- Ruler
- Caligo Safe Wash Relief Inks and Extender
- Palette knives
- Inking Plate
- Roller
- Thin paper to print on