
Screen Printing Using Mylar Film for Registration and a Stencil

Mylar film is an extremely useful addition to your printmaking kit. It can be used to mask off areas when relief printing, as registration plastic for screen printing or even used to make stencils. In this project, we use mylar film to make a registration device and a mask for screen printing.
Mylar film can be wiped clean and used again and again. Unlike paper stencils, mylar stencils can be cleaned and used another day or with another colour. Using Mylar film for registration means the same piece can be used over and over. The mylar film comes rolled so it may need flattening out before use, especially for large stencils.
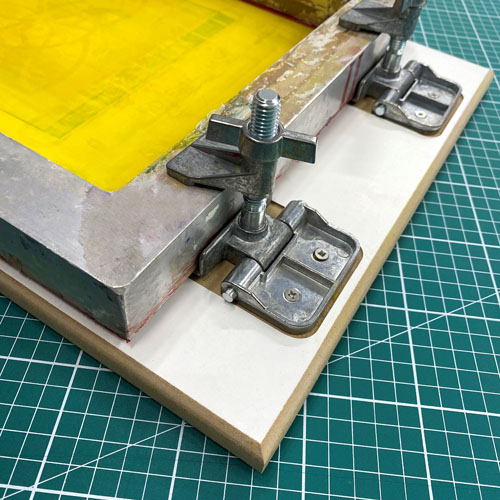
We are printing onto paper using a hinged board: a melamine coated MDF board with hinge clamps attached at the top. The hinges have been lowered a little by routing out the surface of the board so that the screen lies closer to the surface. We’re using an A4 90T screen.
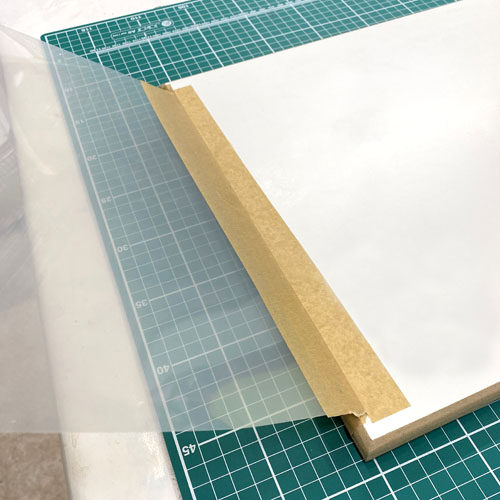
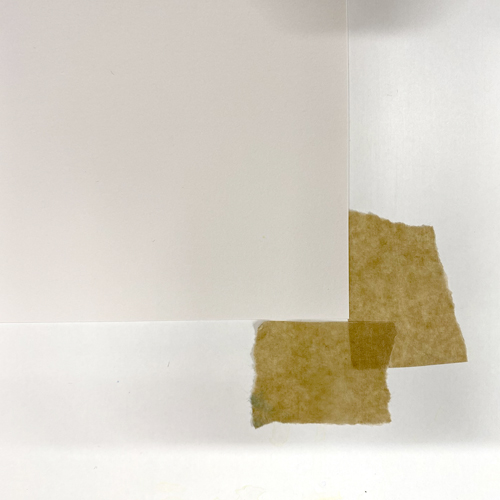
The registration device can be created by taping a piece of mylar film to the bottom of the board. Use tape on both sides to create a hinge. It needs to be big enough to cover the whole board but not interfere with the hinges.
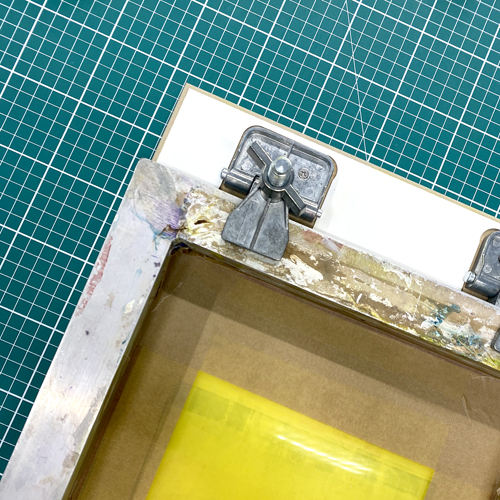
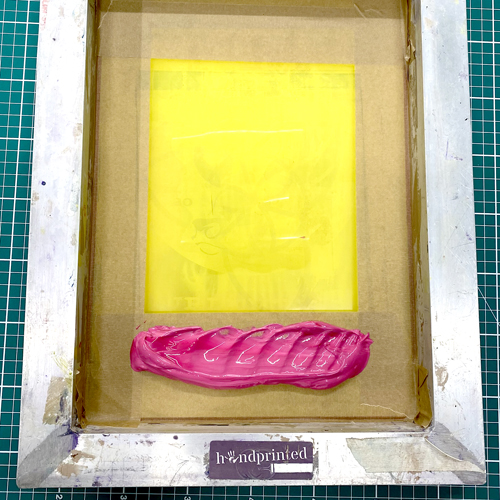
Use parcel tape to tape the edges of the screen, leaving an aperture in the centre for the ink to go through. If you’re making a stencil, make the aperture slightly smaller than the stencil. If you’re using a mask, tape a neat aperture that will fit nicely onto your paper.
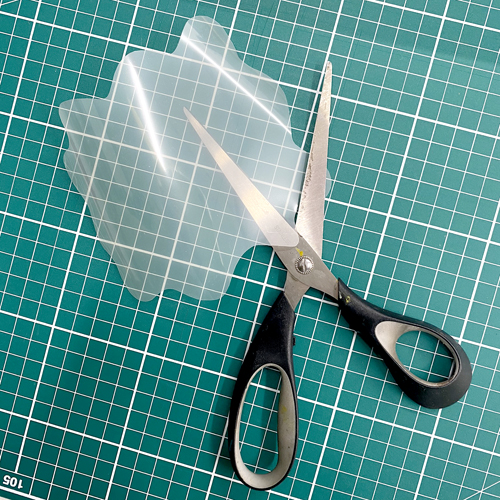
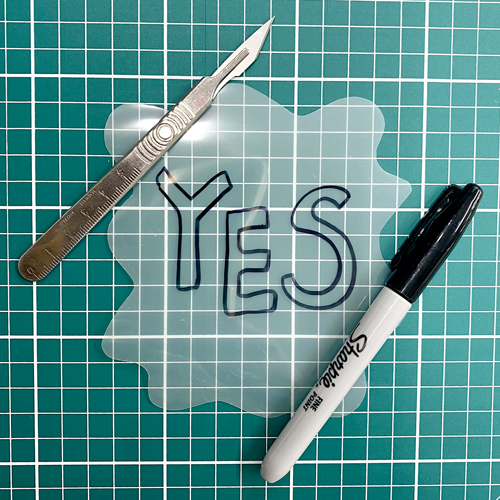
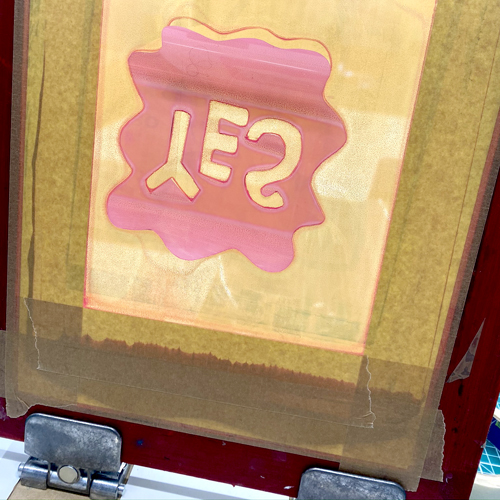
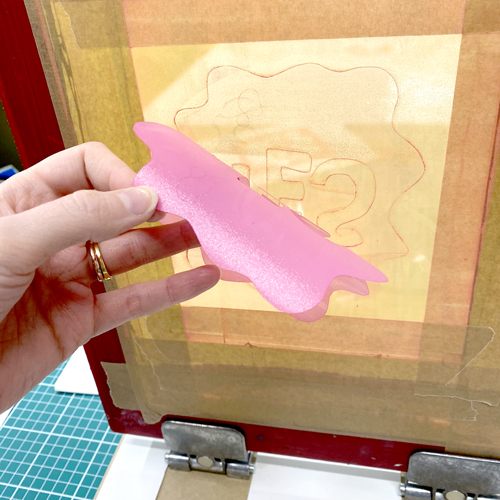
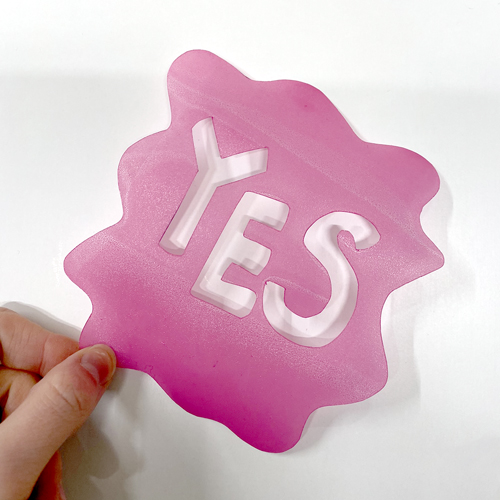
Use scissors or a scalpel to cut the mylar film into your desired stencil shape. We are creating a mask: a positive shape that will block the ink from the paper.
The film can be drawn on with a permanent pen to help with the design.
With the screen attached to the board using the hinges,
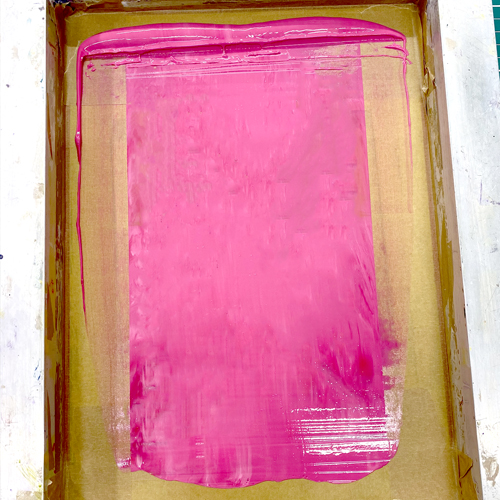
place the stencil or mask underneath the screen, making sure the whole stencil fits in the untaped area of the mesh. Load a line of Acrylic Screen Printing Ink along the bottom of the screen.
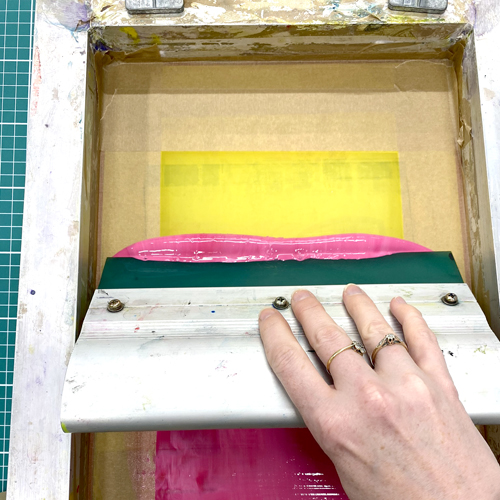
Prop the bottom edge of the screen up on a block using something like a roll of tape. This should hold the screen away from the board at one end. Use the squeegee at a 45′ angle to push the ink up the screen. This floods the mesh with ink. You don’t need to press, just glide the ink along the mesh.
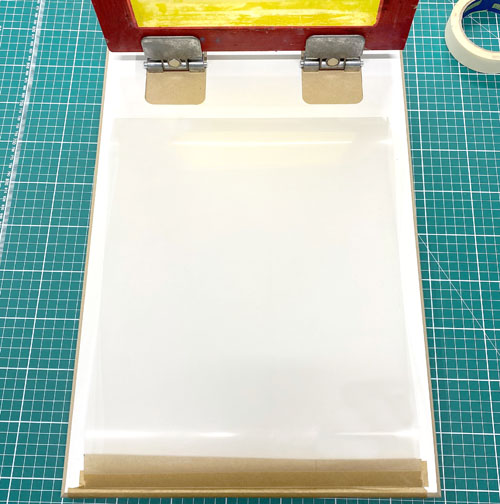
Remove the block that’s propping up your screen and place it down on the board. Make sure the mylar registration plastic is covering the board underneath the screen.
Use the squeegee at a 45′ angle to drag down the screen, pressing firmly this time. The squeegee movement should sound a bit like a zip. Lift up the screen and reveal the print on the plastic.

The stencil should stick to the mesh.
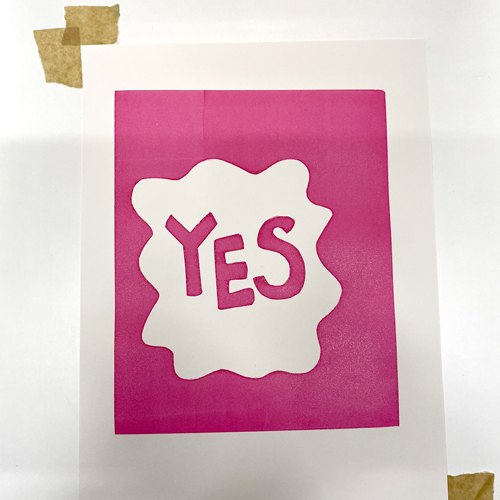
Leaving the registration plastic in place, slide a piece of paper underneath, positioning it where you would like the print to be placed. The print on the plastic should show you where the print will go.
Use small pieces of tape or mount board to mark where the paper should be placed each time. You can also spray a little low-tack spray mount onto the board to help hold the paper still.
Remove the registration plastic by folding it down in front of the board out of the way.
Repeat the printing process by flooding the screen and then printing firmly with your squeegee, this time with paper underneath. Lift the screen to reveal the print!
Repeat this process until you have your entire edition, placing the paper down using your tape markings each time.
When you are finished with the stencil, it can be peeled off and washed to be used again another day or with another colour.
If you are printing a multi-layered print, the registration plastic is even more useful! When printing your second layer, slide the first layer of the printed paper underneath to check they will line up. Use new pieces of tape or mount board to mark where the prints should be placed.
For this project you will need:
- Mylar Stencil Film
- Hinge Clamps
- Board (preferably melamine coated with routed out places for the hinge clamps)
- Scissors or a scalpel and cutting board
- A4 90T Screen
- Acrylic Screen Printing Ink (Speedball Pre-Mixed or Acrylic Paint mixed 50/50 with Acrylic Screen Printing Medium)
- Squeegee (a 225mm for an A4 screen)
- Parcel Tape
- Paper to print onto (we used Kent)