
Simple Bookbinding to Use Up Misprints and Scrap Paper
If you have a stack of papers in your house too pretty to recycle then here's a way to make something beautiful from them. It's perfect for misprints and test prints too!
These little sketchbooks and notebooks are easy to make and can be wonderfully personalised. Scroll to the bottom to watch a video or read on.
Begin with a little stack of papers - you can mix up the paper types but we want them all to be the same size. Fold them all down the centre. Arrange them in an order you like inside one another's folds like a booklet.
Cut another piece for a cover - it helps if it's a mm or two longer than the others so the edges of the booklet are neat. Fold this like the others and place it around the outside of the inner pages.
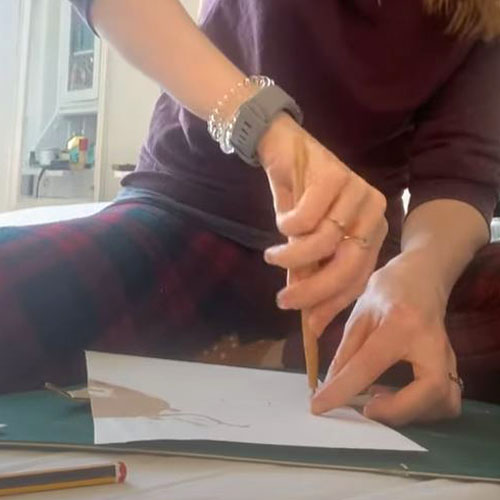
Next, we need to make the holes in the pages so they can be stitched together. Ideally, we would stab through all the pages at once but depending on your tool, you may need to do just a few pages at a time. You will need an awl or an etching needle to punch holes through the pages. At a push, use the point of a scalpel blade or a very sharp pencil to do one or two pages at a time.
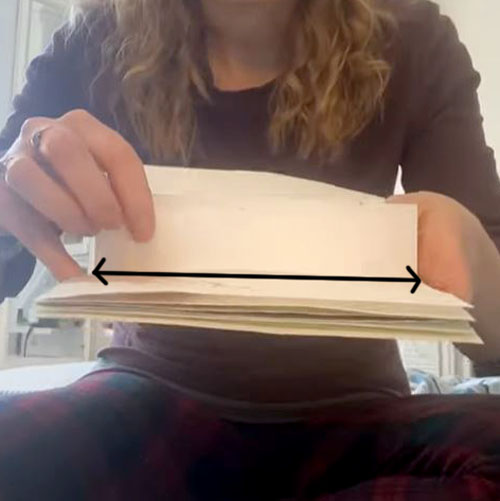
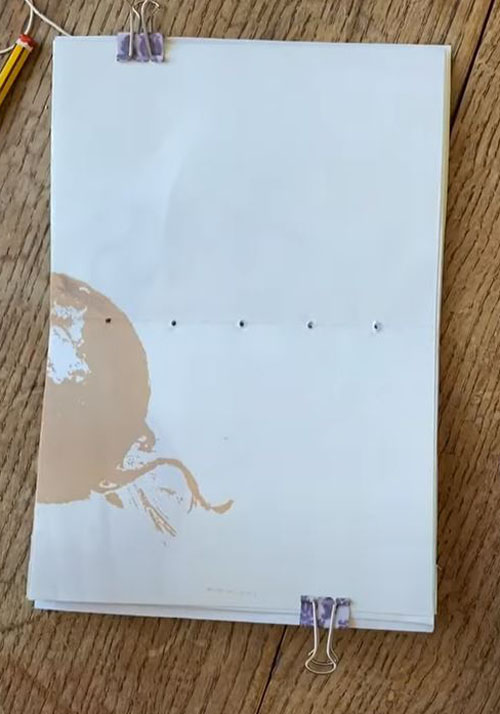
To mark where the holes will be made in the pages we can make a template. Cut a strip of paper the same length as the spine of your booklet. Fold it in half and mark the centre. Divide each half into 3 so there are 5 equidistant marks in total along the length of the paper. When we place this paper along the inner spine of the book, it will show us where to puncture.
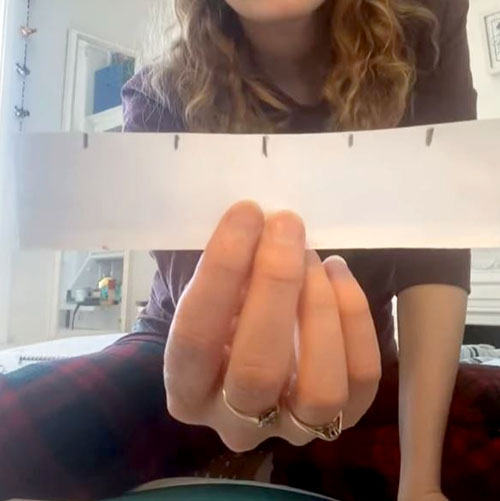
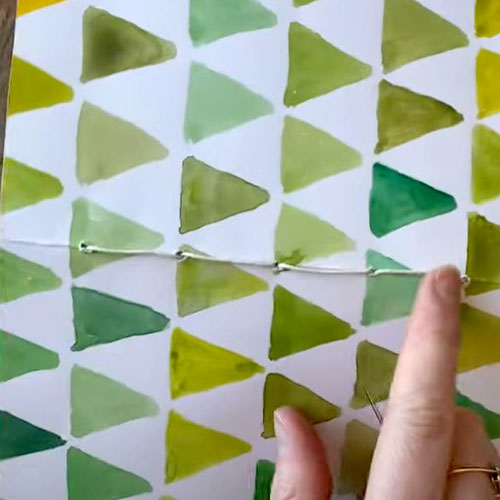
Use your awl, etching needle or similar to puncture through the spine or each of the pages (a few at a time), using the template to get the right position. Use a piece of cardboard underneath to protect your table.
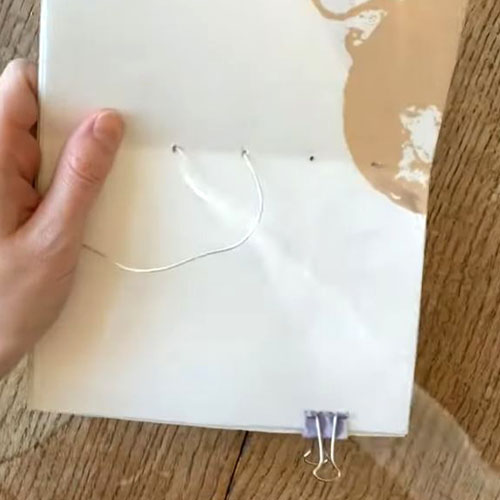
Use bulldog clips to secure all the pages in a stack, lining up the holes. The booklet should be in an open position. Use the awl, etching needle or a sharp pencil to check you can get all the way through all 5 holes. Make sure your cover is at the back, facing outwards.
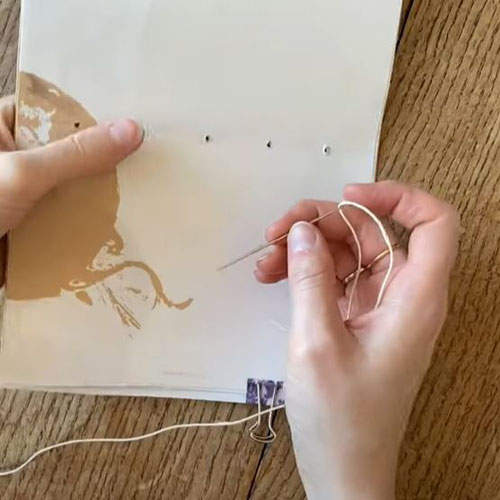
Choose a strong cord to bind your book. You may need to work the holes a little bigger if the cord is thick. Thread a thick needle with the cord (a darning needle is ok but a needle where the eye is not fatter than the length is even better). If the cord is stiff and you're not working with too many pages, you may be able to do this without a needle at all. You could also try using ribbon or string.
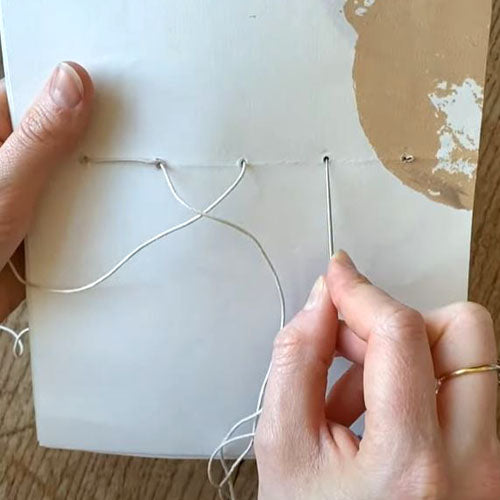
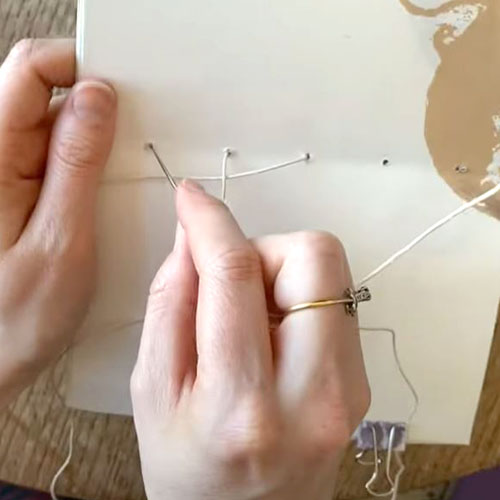
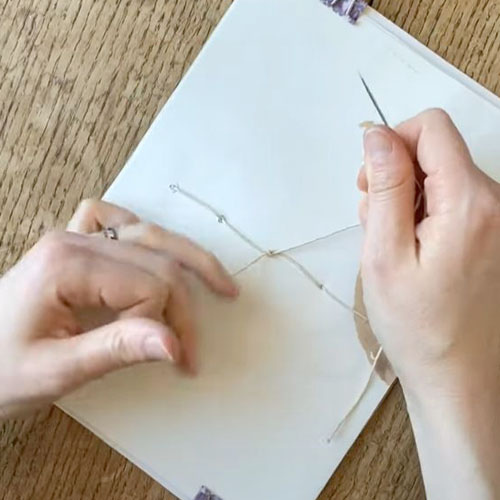
The spine is stitched in a specific pattern (less confusing than it first looks):
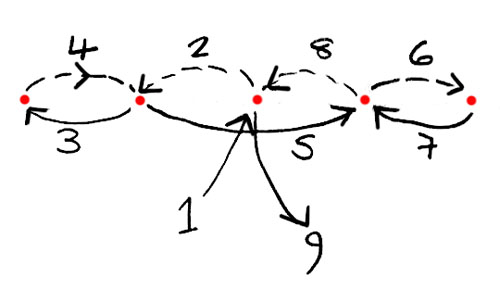
1 - First, go down through the centre hole. Pull a long tail through.
2 - Come up through the middle-left hole. Pull it tight.
3 - Go down through the outermost left hole. Pull it tight.
4 - Come up through the middle-left hole again. Pull tight.
5 - Go down through the middle-right hole. Pull tight.
6 - Come up through the outermost right hole. Pull tight.
7 - Go down through the middle-right hole. Pull tight.
8 - Finally, come up through the middle hole. Pull tight.
2 - Up through the middle-left
3 - Down through the outermost left hole

4 - Up through the middle-left hole again
5 - Down through the middle-right
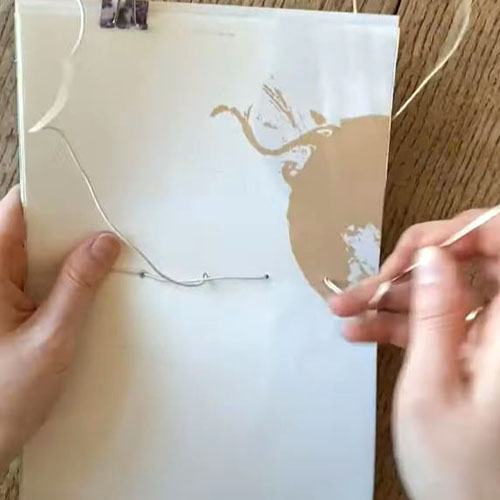
6 - Up through the outermost right
7 - Down through the middle-right
You should have loops between each hole on the front and the back.
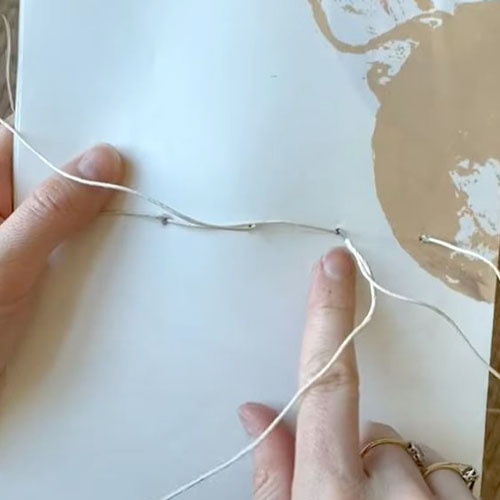
Tie a secure knot in the middle where both ends of the cord should be. Cut off any excess cord.
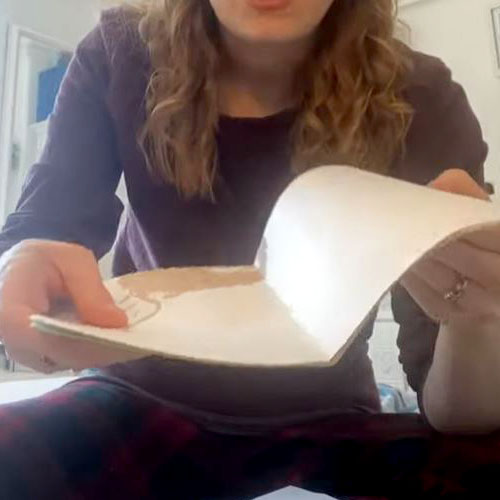
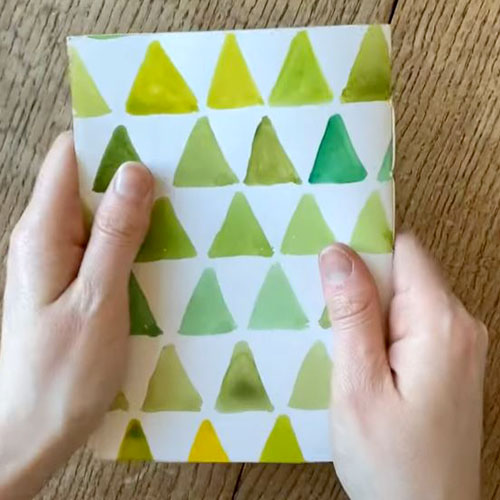
Unclip the pages and fold to see your final book!
You will need:
- Stack of papers
- Scissors or scalpel and cutting board
- Awl, etching needle or something else sharp
- Scrap of cardboard
- Strong cord or similar
- Needle (not essential)