
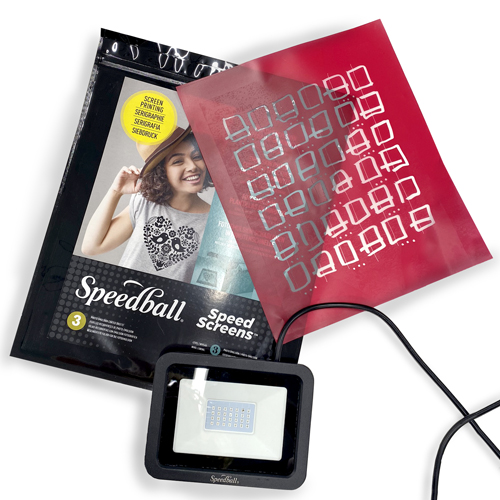
Speedball Speed Screens for Easy Screen Printing at Home

Speedball’s Speed Screens are a great new way of exposing a design at home without the mess of Photo Emulsion. Speed Screens are light-sensitive, pre-coated emulsion mesh sheets. This means they’re ideal for a home studio setup as you don’t need anywhere dark for a screen to dry. They come in packs of three 10 x 12 inch sheets in a light sealed packet, so you can pull out a sheet right when you’re ready and seal the others away from the light to use another day.

Begin by preparing your screen artwork. We are using an Inkjet Film drawn with Zig Opaque Pens and a Jacquard Film Marker. You could also print out your design using an inkjet printer.
Please note that the design needs to be flipped on the film. This means that the design will print as a mirror image compared to your drawing on the film. We are using a pattern design which works printed either way but if you’re using words, numbers or a design that has a right way round, please flip it before making the screen film.
Your design must be solid black and white, without grey areas. The black areas need to be as opaque as possible. Zig and Jacquard opaque Markers work very well. The black areas will be the parts that print.
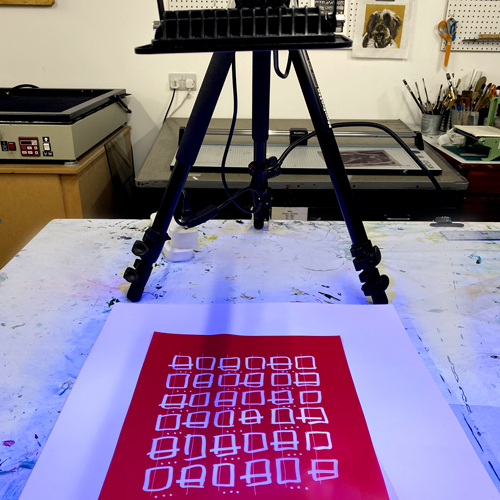
To expose the film, use Speedball’s UV light. It should be held 14 inches above the film for 1 minute. You can suspend the light from a tripod, chair or table, or simply hold it by the handle. Work in an environment with subdued lighting if you can, out of direct sunlight.
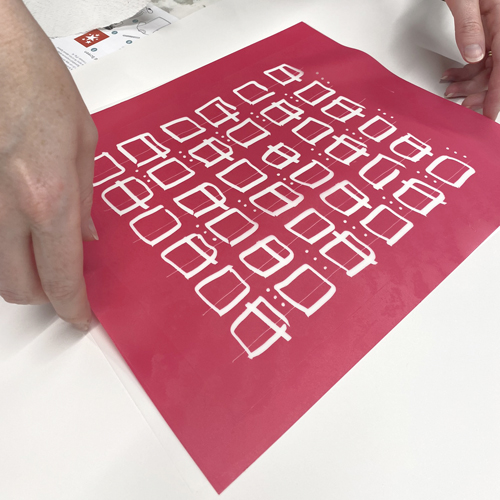
When you’re ready to set up, peel the white film off the Speed Screen sheet. Keep this for later. The Speed Screen is two sided – one side is brighter red (the exposure side), the other is paler pink (the squeegee side). Place the film on top of a black piece of paper on a table or floor red exposure side up.
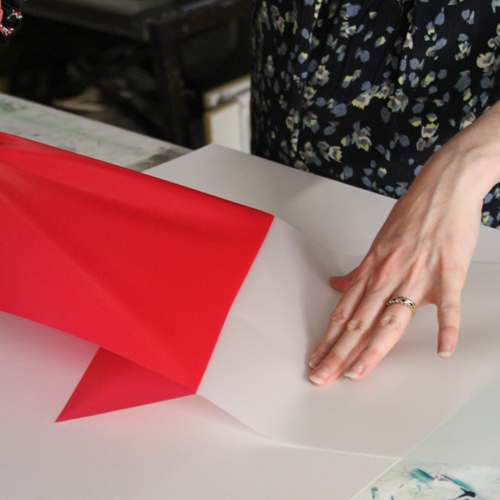

Quickly position the artwork on top. It’s important that the inky side of the film is face up and not in contact with the emulsion side of the mesh. The artwork should appear as a mirror image when placed down. Place a piece of acetate or glass over the top of the film to hold it still.


Turn on the UV light, holding it 14 inches away from the Speed Screen. Leave it on for 1 minute. If you’re using a different light source, you may need to experiment with different distances and exposure time.
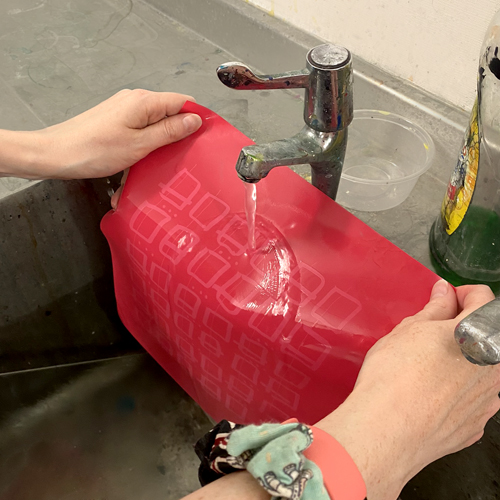

As soon as the time has elapsed, turn off the light, remove the acetate or glass and screen film and run the Speed Screen under hot water. This should reveal the image. Use a spray hose if you have one with hot water – a shower hose is ideal. Do not soak the screen or lay it in the bottom of a sink. Placing the Speed Screen on a sheet of glass or similar at an angle is ideal.
It’s important not to touch the design at all. Be very careful not to scratch the emulsion as it is very prone to marking at this point.
Now the design is visible, you can rise it with a gentle hose until all the excess pink emulsion washes from the design. Do not use a sponge, brush or your hands to try to wipe the emulsion from the design as it will damage the screen. Just let the water rinse it until the whole design is clear. You can hold it up to the light to check that no excess emulsion remains in the design.


Lay the Speed Screen down on some paper towel and very gently blot it.
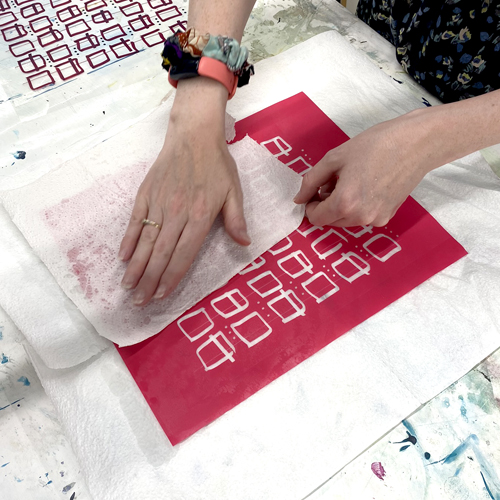

Then move it to sit on top of the white sheet we peeled away earlier. Leave it to dry for 45 minutes (or longer if you can). You can use a hairdryer to dry it if you wish. The screen is very tacky at this point so be very gentle with the surface. The colour should get a little darker as it dries, and it should become more rigid.

Before the screen is ready to print with, it needs to be exposed again to harden the emulsion. Again, place the Speed Screen emulsion side up 14 inches under the UV light. Expose it for 1 minute again. When making our Speed Screen, we did this the day after the first exposure.

When the screen is exposed for a second time, it is ready to print with! If you wish, you can stretch the screen onto a frame but you can also use it loose.
We are printing onto fabric so we have pinned a piece of cotton onto a padded surface. It’s helpful to keep your fabric as still as possible so pinning it tightly out works really well. You can also print onto paper if you prefer – thicker paper works best as it is more stable.
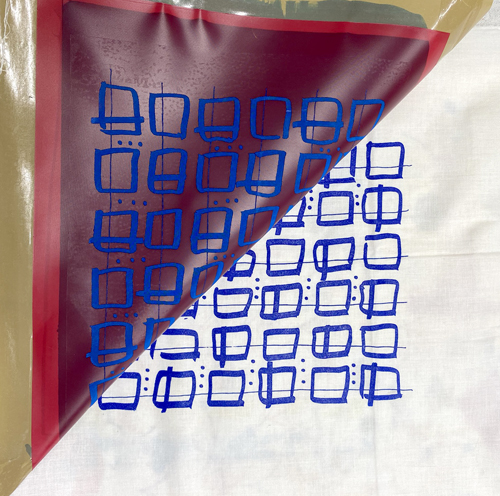
Tape the Speed Screen down on the fabric using painters tape or parcel tape. Spoon a row of ink along the top of the screen. We are using Speedball Fabric Screen Printing Ink.


Use a Speedball Textile Squeegee at a 45 degree angle to force the ink through the mesh. We found that it’s best not to flood when printing with Speed Screens, just pull the ink down the mesh once to take your print.


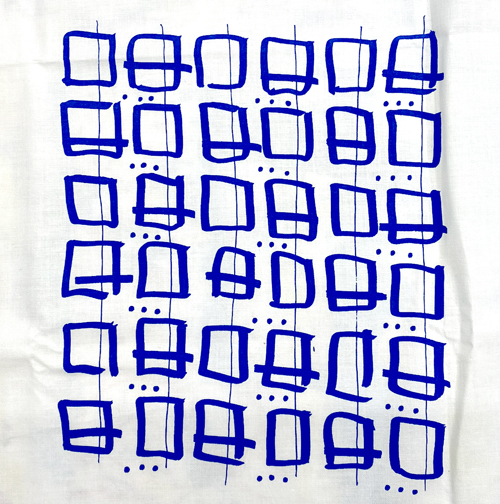
Peel the Screen up off the fabric or paper to reveal your print.


You can stick the screen back down on another piece of fabric to take a further print. When you’re finished, peel away the tape and rinse the Speed Screen in cold water. Blot it with a paper towel again. Leave it to dry: you can use the white peel away sheet to lay it down. When it is completely dry, you can print again.
For this project you will need:
- Speedball Speed Screens
- Speedball UV light
- Inkjet Screen Film
- Zig Opaque Pens, Jacquard Film Marker or Inkjet printer
- Sheet of acetate or glass to hold the screen film still when exposing
- Kitchen Roll
- Speedball Textile Squeegee
- Speedball Fabric Screen Printing Ink (if printing onto fabric)
- Padded surface and pins (if printing onto fabric)
- Fabric or paper to print onto