
Using Mirror Card to make an Expressive Drypoint
Mirror Card is a great option for intaglio plate making. It's shiny and wipeable, making it brilliant for expressive inking and sketchy designs. Peel away the surface to create dark, inky areas too. Scroll to the bottom to watch a video of the whole process or read on for instructions.
Mirror card is a thin card with a shiny surface on one side. It works similarly to tetra pak printing but is available in flat A4 sheets, unlike tetra paks which are irregularly shaped with creases and folds.
This is an intaglio process which means that lines are drawn into the plate, inked up, wiped and then printed onto dampened paper. Ideally, an etching press is used to print (but we have a method for printing without a press here).

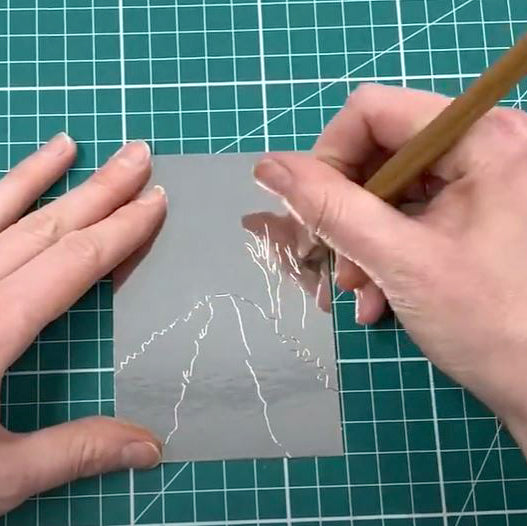
Cut a piece of mirror card to your chosen size. Use an etching needle to draw into the plate. Press quite firmly so that lines are scored into the plate.
Use hatching and cross hatching to create areas of tone.

To create solid areas that will hold on to lots of ink, use a scalpel to score the edges of a section (being careful to not cut all the way through the card) and then use the point of the scalpel to lift the shiny surface of the card and peel it away. This reveals the fluffy surface of the card inside: a texture that ink will cling to.

Before beginning to ink up the plate, soak your paper in a tray of water. We are using 300gsm Snowdon paper. A thick paper like this soaks well and prints intaglio work beautifully.
We are using Akua Intaglio Ink, a soy based ink that is easy to clean up with soap and water.

Working on an inking plate, use a wad of rag to to dab ink all over the surface of the plate.
Next, use a piece of scrim to wipe the plate, using a twisting motion to work the ink into the lines whilst removing excess from the surface. At this point, you should see the drawing emerge.

Use a clean rag to remove further ink from the plate. Wrap it around the end of your finger to shine up the plate more precisely. Alternatively, use a cotton bud. Shine up any areas that you would like to appear white in the final print. You can add more ink with scrim in areas that you would like more texture.

Lay the plate face up on the bed of an etching press (or see here for a press-less method). Blot the soaked paper. It should feel damp but not be dripping wet. Lay the paper on the plate and cover with a blanket. Roll it through the press, set with a tight pressure.

You can then ink up and plate again for another print. When finished, clean any excess ink from the plate with a cloth.
For this project you will need:
- Mirror card
- Etching needle
- Scalpel
- Cutting Mat
- Akua Intaglio Ink
- Inking Plate
- Scrim
- Rags
- Paper (such as Snowdon)
- Tray in which to soak paper
- Blotting paper (or similar)
- Etching press, if using