
Transferring a Linocut to Inkjet Film using Adigraf Water Soluble Ink
We've recently discovered that you can expose a screen with artwork made by transferring a linocut to inkjet film using a water based ink.
Often when we want to convert our relief prints to screen prints, we need to use some kind of digital programming to make this possible. With this technique there are no computers involved, making it more accessible to those who aren't particularly tech savvy. In this blog post we will take you through the steps of transferring your design to the film, and show you the different results you can achieve by using either a baren or printing press.

For this project we are using the new Adigraf Water Based Relief Printing Ink in Black. We want our image to transfer as dark as possible. The inkjet film has a hygroscopic surface on one side which means that the water-based ink is absorbed into the films surface rather than sitting on the top.

Using a soft rubber roller, roll out a nice even layer of ink onto your inking plate. The ink should make a nice hissing sound and look similar to the texture of an orange skin. If the ink sounds squelchy you might have a little too much rolled out.

For this project we are using a previously carved Japanese Vinyl block that contains a good amount of both fine and bold detail. As this is a vinyl block, we gave it a soft sand before applying our ink to ensure that we got a nice even coverage. You will often find that water-based inks reticulate on the surface of vinyl blocks so we would always advise prepping your block by giving it a soft sand with a sanding block before carving.
Once your chosen block has been inked up, you'll be ready to transfer your image.
Transferring the image by hand using a Baren:

Place your inkjet film over your block, print side down. The inkjet film has two sides. One side is shiny like a piece of acetate and the other has a slightly tacky feel. The tacky side is the one we want to print onto. It's best to hold the film in place with one hand and lower the film slowly onto the block with the other. Once the film is in place, give it a gentle rub with your index finger to ensure that you have good contact between the film and block.
To avoid any slippage you may want to make up a jig to keep your block in place. We are using some pieces of mountboard around the edges of our block that we've taped to our cutting mat.

Holding the block steady with one hand, use a baren in circular motions across the back of the film to take your print.

Carefully peel the film away from the block.

Transferring our image using our Abig Etching Press:

Alternatively, you can transfer your image using a press. We're using our ABIG Etching Press but a Relief Press would also work. Place your inkjet film over your inked up block, print side down. Hold the film in place with one hand and lower the film slowly onto the block with the other. Give it a gentle rub with your index finger to ensure that you have good contact between the film and block.

Run the block through the press.

Carefully peel the film away to reveal your print.
Top Tip:

Here you can see the difference between the block before it was sanded (left) vs after (right). Putting your film up to the light is a great way to see whether the coverage is strong enough. You want it to be completely opaque so that it will block the light when exposed.

Take your chosen screen, decrease and coat with emulsion. We are using a 32 x 32cm screen with 43T mesh as we will be printing onto fabric. You can use washing up liquid, cold water and a soft bristle brush in circular motions to do this. Coat the screen with Speedball Photo Emulsion that has been mixed with Speedball Sensitizer using a Scoop Coater.

Once your screen is exposed you'll be ready to print.

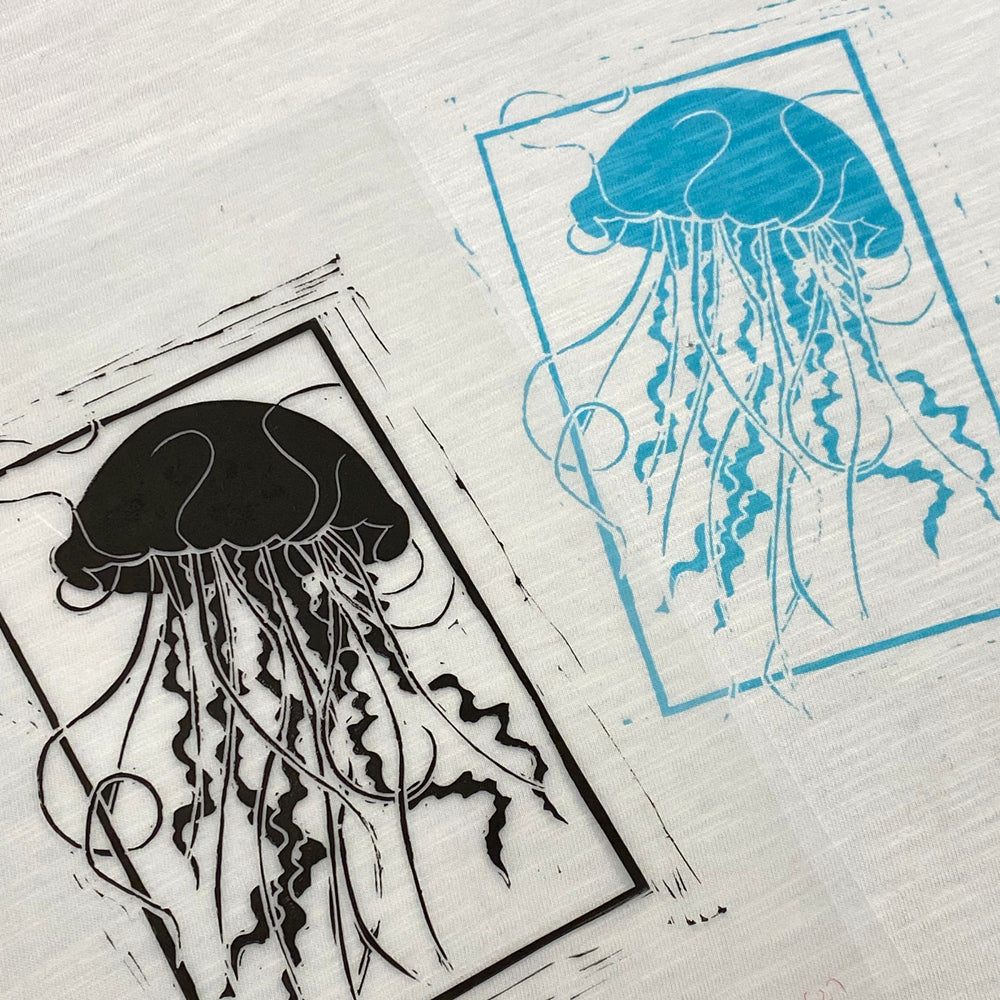
Place your taped screen onto your chosen substrate and apply a thick bead of ink at the top of your design. For this project we are using a textiles ink made up with Permaset Print Paste and our own Pigments.
Flood your screen with ink, lightly pulling your squeegee down the screen at a 45 degree angle. Your pressure should be light when flooding as you only want to fill the open areas with ink rather than push the ink through.
Place your squeegee back to the top of your design without any excess ink. Take your print pulling towards you at a 45 degree angle this time with more pressure. It should sound a bit like a zip!

Lift your screen like opening a book to reveal your print! If you are doing a run of prints, it is important to remember to flood your screen in between each one to avoid the ink drying and blocking the mesh.

Here is the final print! You can see that we've lost some of the chatter detail from around the design. This is most likely due to the transfer not being completely opaque in those areas.
For this project you will need:
-
UV Lamp or Exposure Unit
-
Screen Printing Ink - Acrylic ink for paper or Fabric ink
-
Newspaper
-
Padded printing surface (for fabric only)
For help with exposing your own screens at home take a look at our other blog posts Exposing a Screen using Speedball’s UV Light and At Home Screen Exposure with Bridget